| Moderated by: chrisbet, | Page:   |
|
|||||||
| Bird Photography 2021 - Page 7 | |
| Bird Photography 2021 - replacing Bird Photography 2020 | Rate Topic |
| Author | Post |
|---|
| Posted: Sat Feb 20th, 2021 16:24 |
|
61st Post |
Iain

|
I prefer the first image Eric with the background not blurry. I have tried to get away from the bird etc dominating the image and where the background is acceptable leave it visible as habitat.
|
||||||||
|
| |||||||||
| Posted: Sat Feb 20th, 2021 20:25 |
|
62nd Post |
jk
|
I thought I would do that one of the Hummingbird moth as I was never sure if I liked the background in the original, but maybe the problem was the crop I made! I prefer your crop. Re: " Incidentally, somewhere on my desktop I have a PS Action that sequentially layers focus progressively back in stages giving increasing levels of defocus away from a subject to give quite a natural depth of field effect. I created it after messing up a shoot with the wrong aperture. " If you can find it I would be interested to test out as I did this by hand with a duplicate layer with a large amount of gaussian blur and a mask. I should have made it as a smart object so I could change the blur. I always remember half way through the exercise. There are always many different ways to do stuff in Photoshop it really is a total learning experience.
____________________ Still learning after all these years! https://nikondslr.uk/gallery_view.php?user=2&folderid=none |
||||||||
|
| |||||||||
| Posted: Sun Feb 21st, 2021 05:38 |
|
63rd Post |
Eric

|
jk wrote:I thought I would do that one of the Hummingbird moth as I was never sure if I liked the background in the original, but maybe the problem was the crop I made! My desktop is out of action at the moment (lack of use) but will see if I can find it elsewhere on a drive. From 15year memory....... The process started with tight masking ALL the areas behind the subject. Apply a minimal blur as the 'base coat' start this action.. Contract the mask by 2 pixels > Apply a feather of 1 pixel > Apply 5% more blur Contract the mask by 4 pixels > Apply a feather of 2 pixel > Apply 5% more blur Contract the mask by 10 pixels > Apply a feather of 5 pixel > Apply 10% more blur Contract the mask by 20 pixels > Apply a feather of 10 pixel > Apply 10% more blur Contract the mask by 50 pixels > Apply a feather of 20 pixel > Apply 15% more blur Contract the mask by 100 pixels > Apply a feather of 50pixel > Apply 20% more blur The actual numbers may be wrong but the principal is the same.....ie don't apply feather to the mask in the first instance, then soften the edge effect by 'one step forward - half back' approach, increasing the intensity as you go further back. There are a couple of pitfalls to watch out for. The mask moves away from the frame edges incrementally so you are left with an edge and top that needs a small crop. If the mask is not horizontal behind the subject lower areas may get more blurring than their distance demands. So using the rectangle mask to subtract these irregularities halfway through the action (or step back afterwards and restart) irons out this issue. Of course Adobe may have added this filter to more recent versions ....but I am still old school diy.
____________________ Eric |
||||||||
|
| |||||||||
| Posted: Sun Feb 21st, 2021 06:01 |
|
64th Post |
Eric
|
Iain wrote:I prefer the first image Eric with the background not blurry. I have tried to get away from the bird etc dominating the image and where the background is acceptable leave it visible as habitat. I totally agree Iain it seems more natural...more like the eye sees it. I think just using fstop to control background detail should be sufficient. Obviously with location photography, there can often be background detail that distracts that can't be moved. I favour cloning that item out rather than blurring the whole area.
____________________ Eric |
||||||||
|
| |||||||||
| Posted: Sun Feb 21st, 2021 06:24 |
|
65th Post |
Eric
|
Eric wrote:My desktop is out of action at the moment (lack of use) but will see if I can find it elsewhere on a drive.
____________________ Eric |
||||||||
|
| |||||||||
| Posted: Mon Feb 22nd, 2021 15:54 |
|
66th Post |
jk
|
Thanks Eric.
____________________ Still learning after all these years! https://nikondslr.uk/gallery_view.php?user=2&folderid=none |
||||||||
|
| |||||||||
| Posted: Fri Feb 26th, 2021 00:49 |
|
67th Post |
Richard_M
|
WOW, some great photos have been posted recently. I ended up purchasing a Nikkor 500mm f 5.6 pf lens. It turned up yesterday. So far I'm pleased with the lens, although having a few issues with the image stabilisation. I have tried both Normal and Sport mode, but I'm still getting a few images with movement in them. It wasn't an issue with the 200-500mm. More practice I guess. It was overcast this evening after work when I visited the small reserve at the end of our street. Also there were not too many birds around late in the day. A few snaps from this evening using a D500 with 500mm f 5.6 pf lens #1 Laughing Kookaburra  #2 Laughing Kookaburra, I'm not sure if it was laughing at me, the camera, or the new lens   #3 Grey Shrike-thrush  #4 Eastern Yellow Robin 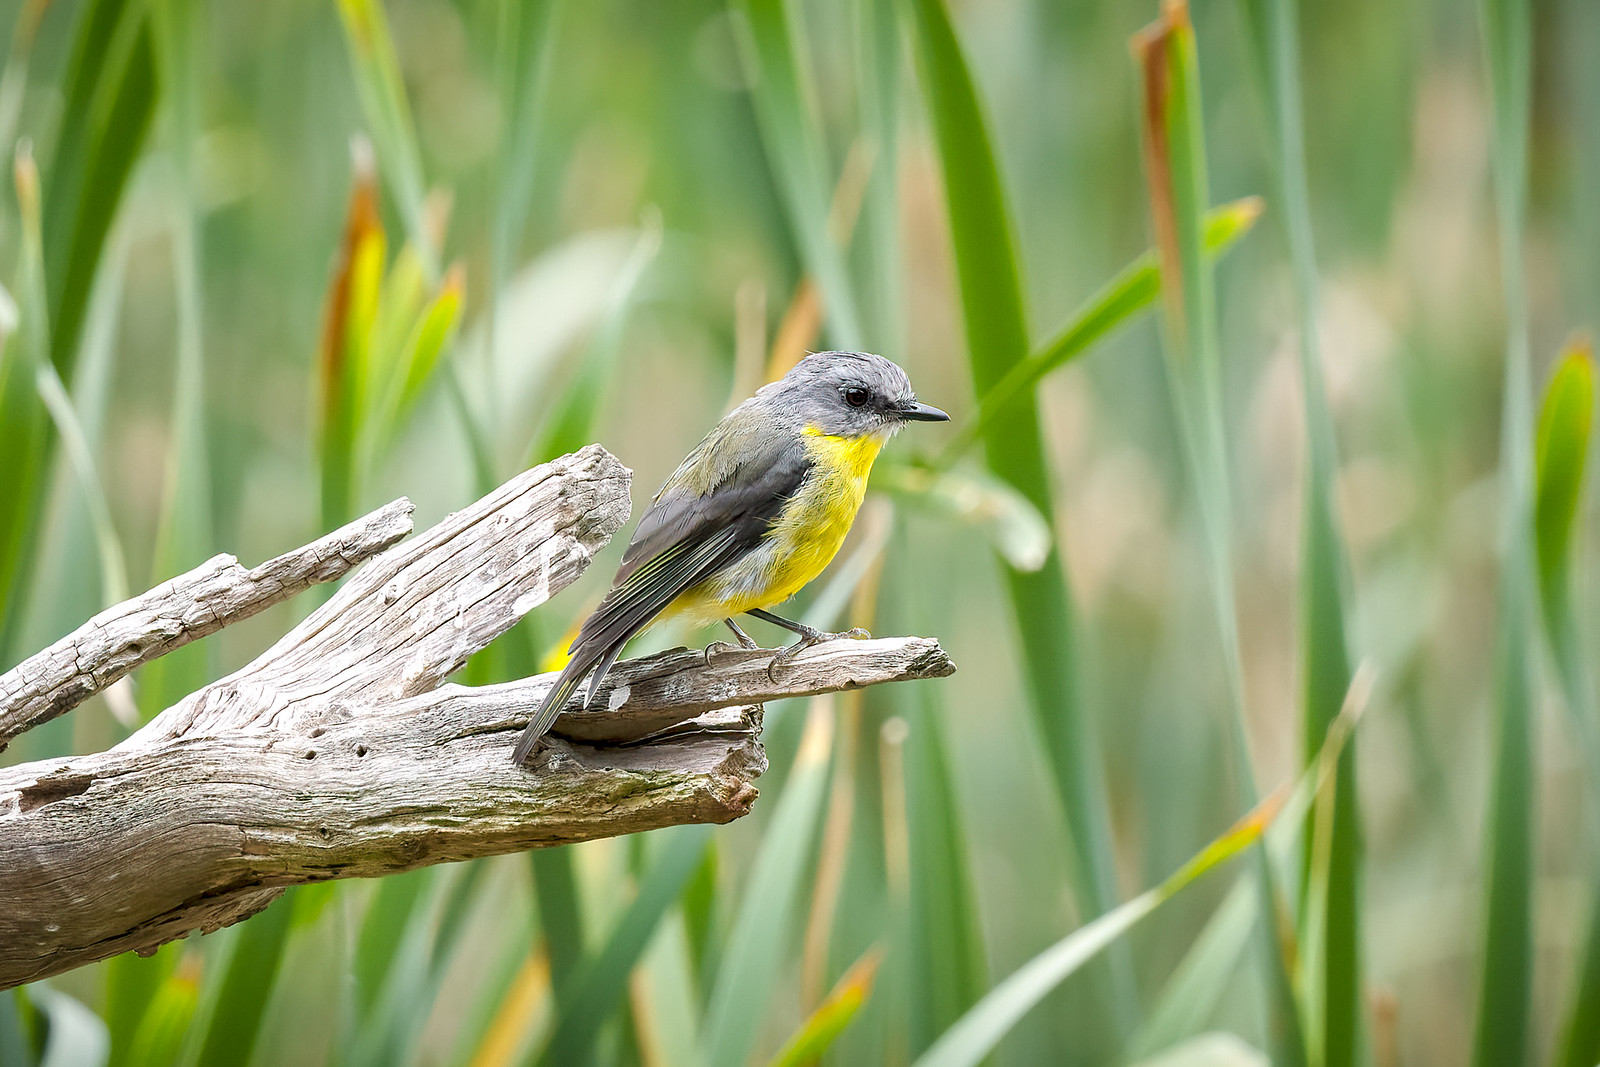
|
||||||||
|
| |||||||||
| Posted: Fri Feb 26th, 2021 04:22 |
|
68th Post |
Eric
|
Nice shots Richard. The 500pf is a lighter lens than the 200-500 and it may be impacting on your stability.... till you get used to it. One of the really useful features on the lens, is the memory focus lock buttons that store preset positions.....enabling you to quickly return to that exact focal spot at the press of the button. I am not a great fan of its bokeh though. I find it a bit unsmooth, and rather artificial When coupled with the latest 1.4x teleconverter there is no loss in quality like earlier teleconverter models ...and 720mm reach (1080mm with the d500)
____________________ Eric |
||||||||
|
| |||||||||
| Posted: Fri Feb 26th, 2021 04:35 |
|
69th Post |
Richard_M
|
Thank you Eric! I don't have the 1.4x teleconverter, it was on my to buy list a year or two back, but I never got around to it. I do have the 1.7x and the 2x. I might try one of them with one of the Z bodies.
|
||||||||
|
| |||||||||
| Posted: Sat Feb 27th, 2021 00:39 |
|
70th Post |
Richard_M
|
Some of the images I managed to get this morning at one of our local gardens. D500 with 500mm f/5.6 #1 Striated Pardalote  #2 Spotted Pardalote  #3 Eastern Spinebill  #4 Red-browed Scrubwren  #5 Eastern Yellow Robin 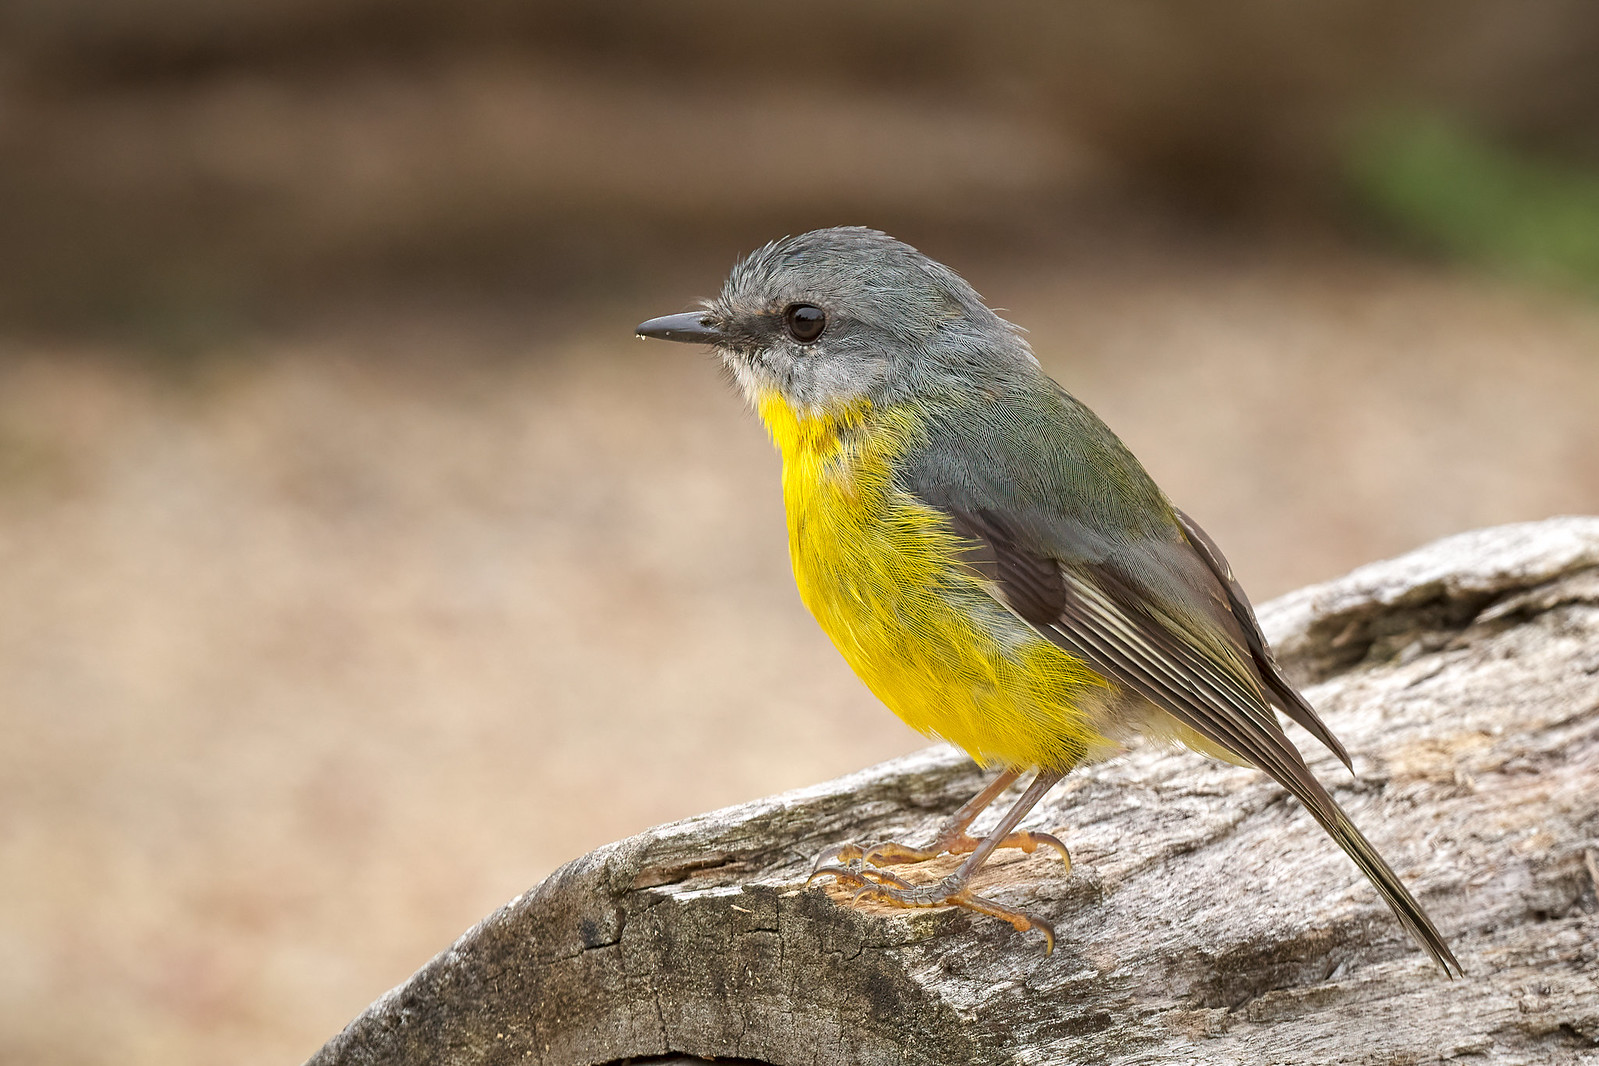 #6 Little Wattlebird  #7 Grey Shrike-thrush  #8 Superb Fairy-wren  #9 White-browed Scrubwren  #10 New Holland Honeyeater  #11 Silvereye  #12 Welcome Swallow  #13 Brown Thornbill  #14 Southern Brown Bandicoot (Please delete if not appropriate) 
|
||||||||
|
| |||||||||
| This is topic ID = 1864 Current time is 00:31 | Page: | |
| Nikon DSLR Forums > Photography > Photography Projects > Bird Photography 2021 | Top | |
Users viewing this topic |
||
Current theme is Modern editor
| A small amount of member data is captured and held in an attempt to reduce spammers and to manage users. This site also uses cookies to ensure ease of use. In order to comply with new DPR regulations you are required to agree/disagree with this process. If you do not agree then please email the Admins using info@nikondslr.uk Thank you. |
Hosted by Octarine Services
UltraBB 1.173 Copyright © 2008-2026 Data 1 Systems
Page processed in 0.0822 seconds (75% database + 25% PHP). 83 queries executed.
UltraBB 1.173 Copyright © 2008-2026 Data 1 Systems
Page processed in 0.0822 seconds (75% database + 25% PHP). 83 queries executed.