| Moderated by: chrisbet, |
|
|
| Google Nik Collection is now free! | Rate Topic |
| Author | Post |
|---|
| Posted by jk: Thu Mar 24th, 2016 18:22 | 1st Post |
| Google Nik Collection is now free apparently. Take a look and download. https://www.google.com/nikcollection/
____________________ Still learning after all these years! https://nikondslr.uk/gallery_view.php?user=2&folderid=none |
| Posted by Robert: Fri Mar 25th, 2016 02:56 | 2nd Post |
| Thank you JK for the heads up, I have just downloaded the full collection and look forward to exploring the latest versions of the filters. I have used earlier versions of these filters and found them to be very useful. Although they were on my mental list of things to get, given the cost, they were well down the list. HOWEVER... In a way I am sad.  This means another goliath has consumed a small software creator and discarded what for many is a precious software resource. This means that Nik filters will cease to be developed and in due course will loose compatibility with the host software and probably operating systems at some point. Also, as cameras evolve there may also be a gradual loss of compatibility with the images. I doubt Google will sell the rights to the software and who would buy them when the software has just been given away to potential customers. This means another goliath has consumed a small software creator and discarded what for many is a precious software resource. This means that Nik filters will cease to be developed and in due course will loose compatibility with the host software and probably operating systems at some point. Also, as cameras evolve there may also be a gradual loss of compatibility with the images. I doubt Google will sell the rights to the software and who would buy them when the software has just been given away to potential customers.
____________________ Robert. |
| Posted by jk: Fri Mar 25th, 2016 12:28 | 3rd Post |
| It contains all the nice Viveza and other plugin items that used to be in NikonCapture2.
____________________ Still learning after all these years! https://nikondslr.uk/gallery_view.php?user=2&folderid=none |
| Posted by Iain: Fri Mar 25th, 2016 14:43 | 4th Post |
| I've never used them before so this should be fun.
|
| Posted by Robert: Fri Mar 25th, 2016 16:13 | 5th Post |
| There are several guidance videos on the Nik site where you download from, they are very good. From installation, accessing the plugins and using them in quite some depth. The HDR seems pretty good, much more controllable than other software I have seen. The Viveza plug in is very clever and what I have been missing. The control point principle is very quick and simple. Like it a lot. It seems improved on the earlier versions I have used. It will take a bit of getting used to but it's definitely a direction I wanted to go.
____________________ Robert. |
| Posted by Robert: Sat Mar 26th, 2016 06:35 | 6th Post |
| Am slowly working my way around the tutorial videos, this is one which I feel conveys many of the advantages of the control points and the techniques they enable. The control points remove the necessity to manually select areas of the image in most cases. https://www.youtube.com/watch?v=1WDY6fkLUDM Just wish he had straightened the lighthouse, it drove me mad being out of kilter!!! It's just over an hour but I felt it was an hour well spent.
____________________ Robert. |
| Posted by jk: Sat Mar 26th, 2016 09:52 | 7th Post |
Do not read or watch tutorials. Use it, it is very easy. 
____________________ Still learning after all these years! https://nikondslr.uk/gallery_view.php?user=2&folderid=none |
| Posted by Robert: Sat Mar 26th, 2016 11:52 | 8th Post |
jk wrote:Do not read or watch tutorials. Use it, it is very easy. I am a cosseted Mac user who loves to use computers by intuition and previous experience but these plug-ins completely bewildered and defeated me, Yes, they are very simple, once you know where they are and what they do. Since I found the Lightroom tutorials I have gained a much more fluid and productive workflow. Sometimes I have taken days not to get the results I knew were there in an image. The recent 'Levels' thing in Lightroom was a big step forward when I found that pressing the Option key while moving the black and white sliders give me exactly what I wanted to achieve the black and white points which previously I needed to take the images into Photoshop to make that adjustment. Software is becoming so complex that it's no longer possible to achieve even basic stuff simply from menu commands. There are so many 'hidden' features which I know must be there but can't find. Apart from the vastly better GUI the main reason I went with Mac back in '88 was that all commands were menu based, if it wasn't on the menu it didn't happen, the basic functions in all Mac software, no matter the creator, all had the same commands. Learn one program, you could more or less use them all. There were no 'hidden' commands, least non an ordinary user needed. That has changed. Rich got me looking at tutorials and I have to say it's been a great help for me and saved me years of fumbling, wondering how to achieve a given process.
____________________ Robert. |
| Posted by Robert: Sat Mar 26th, 2016 16:42 | 9th Post |
| Well after some tutorials I have experimented... One of my favourite IR images taken with the D1 (720nm IR) Not sure what lens, maybe the 18-35. April 2007. This is straight out of the camera, no pp. 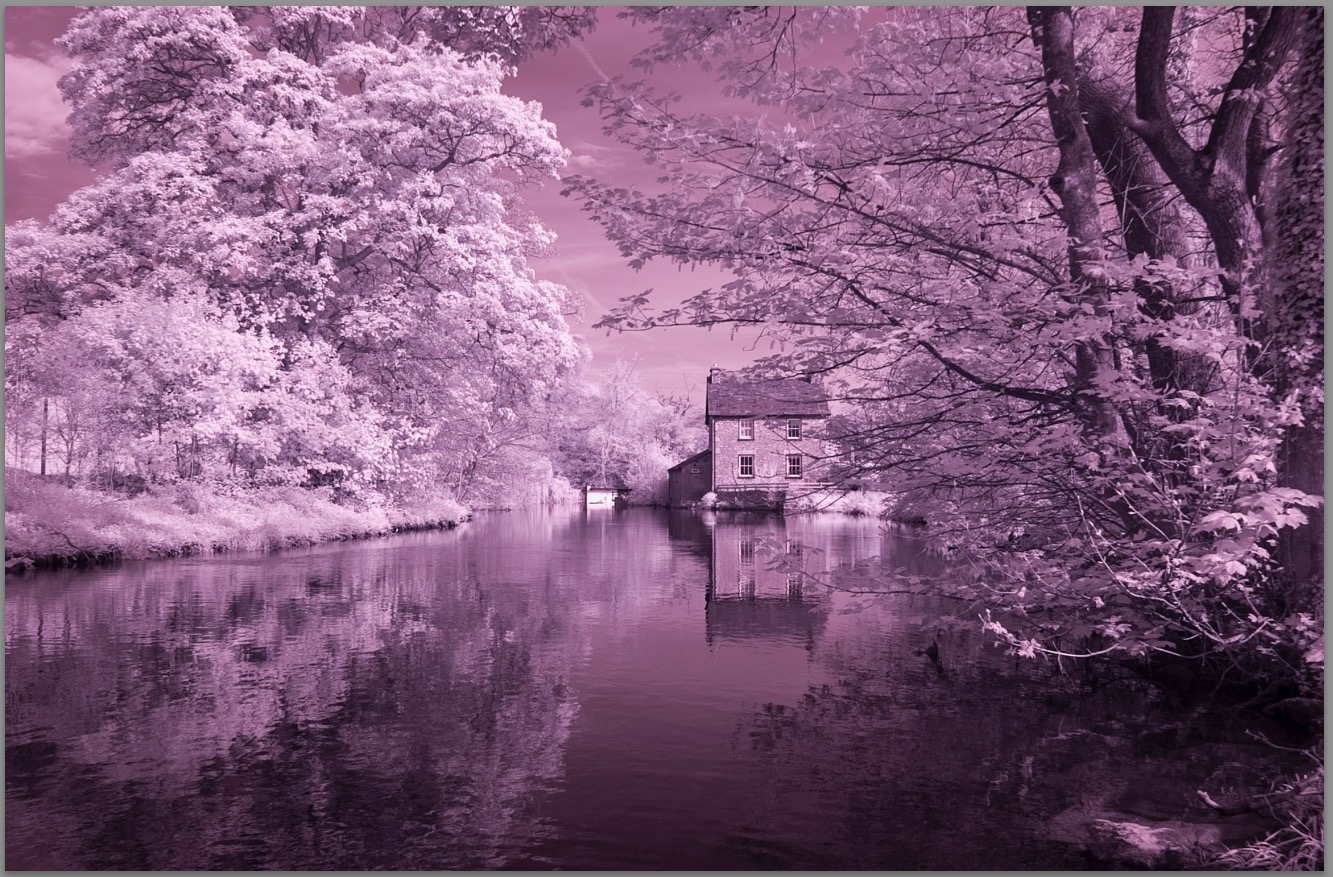 This was my original processed image done in Photoshop, involving channel swapping and white balance extreme adjustments, took several hours tinkering. 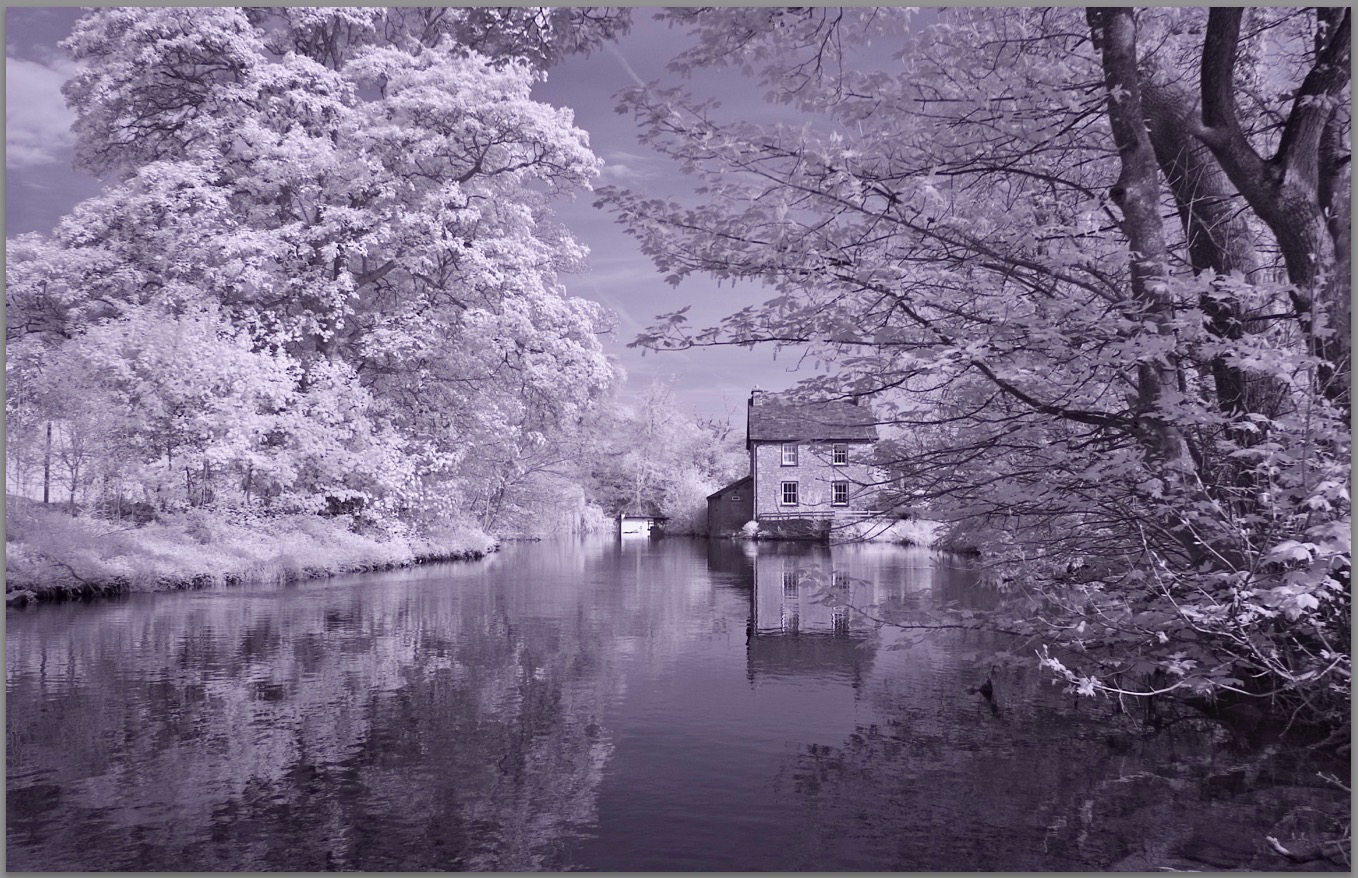 This was my attempt this evening, used Lightroom, made basic ACR adjustments, then entered SilverEfex 2 plugin and applied filter, tinkered, then saved and entered colour Efex 4, tinkered, adjusted contrast and curves, done. Notice the improved clarity of the trees and foliage to the left of the house and the generally cleaner image. 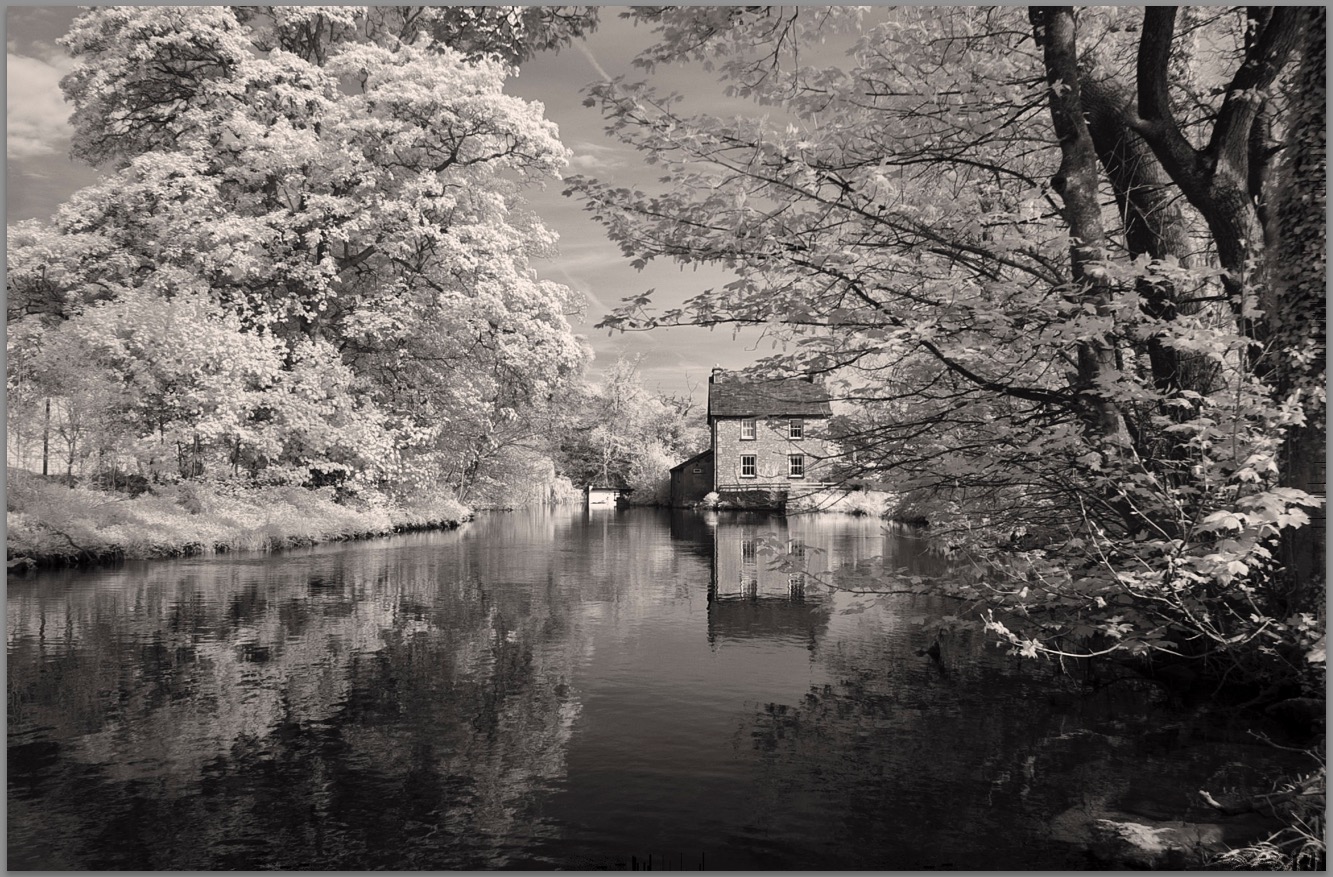 I am sure with more practice and watch a few more videos I will be even better. To be honest, the processing side of IR has been a pain, I have found it something of an ordeal, one reason why I haven't been as prolific as I should be given my equipment and available time, not to mention subjects on my doorstep. My first impression using Silver Efex is very positive, certainly a lot less work and I believe a cleaner image as a result. I have always felt overworking an image shows. I believe adjustments should be made with the fewest steps possible. So, once again, thanks to JK for raising my awareness of the Nik filter giveaway!  Mmmm... Forgot to sharpen it. Tomorrow.
____________________ Robert. |
| Posted by jk: Sat Mar 26th, 2016 18:29 | 10th Post |
| Robert That looks very good. You can save the processing method as a Recipe/Style/Preset and use it as a starter on all your IR images. Recipe in ColorEfex Style/Preset in Silver Efex. Here is one of mine using 005 High Structure (Harsh) in Silver Efex. Attachment: D70IR_0729-sfx.jpg (Downloaded 6 times)
____________________ Still learning after all these years! https://nikondslr.uk/gallery_view.php?user=2&folderid=none |
| Posted by jk: Sat Mar 26th, 2016 18:52 | 11th Post |
| I am surprised that the Nik software does such a good processing of an IR image straight out the box to a B&W image. I need to practice with Color Efex now. Thanks Robert for another set of experiments I need to do. 
____________________ Still learning after all these years! https://nikondslr.uk/gallery_view.php?user=2&folderid=none |
| Posted by Robert: Sun Mar 27th, 2016 00:04 | 12th Post |
jk wrote:I am surprised that the Nik software does such a good processing of an IR image straight out the box to a B&W image. Have had a play with your image JK, took it int Lr, then to Colour Efex, tried various filters and ended up using just Detail Extractor. I made a screenshot of the control points and settings so you can try it yourself. I tried to improve the definition of the paving and the ferns and other large leaved plants. 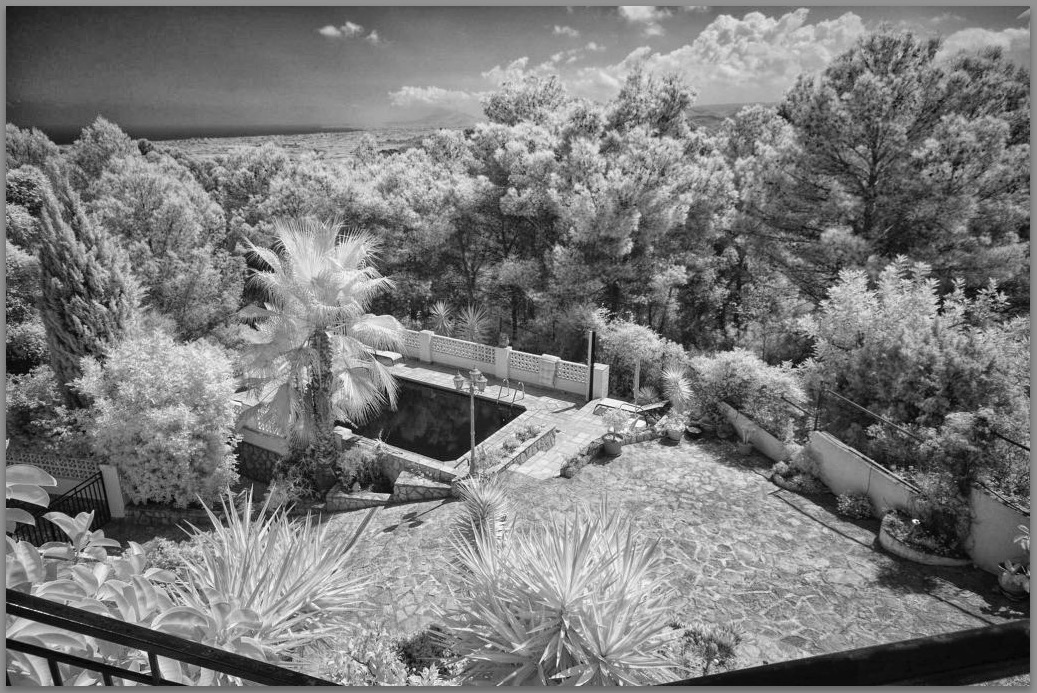 And the control points: 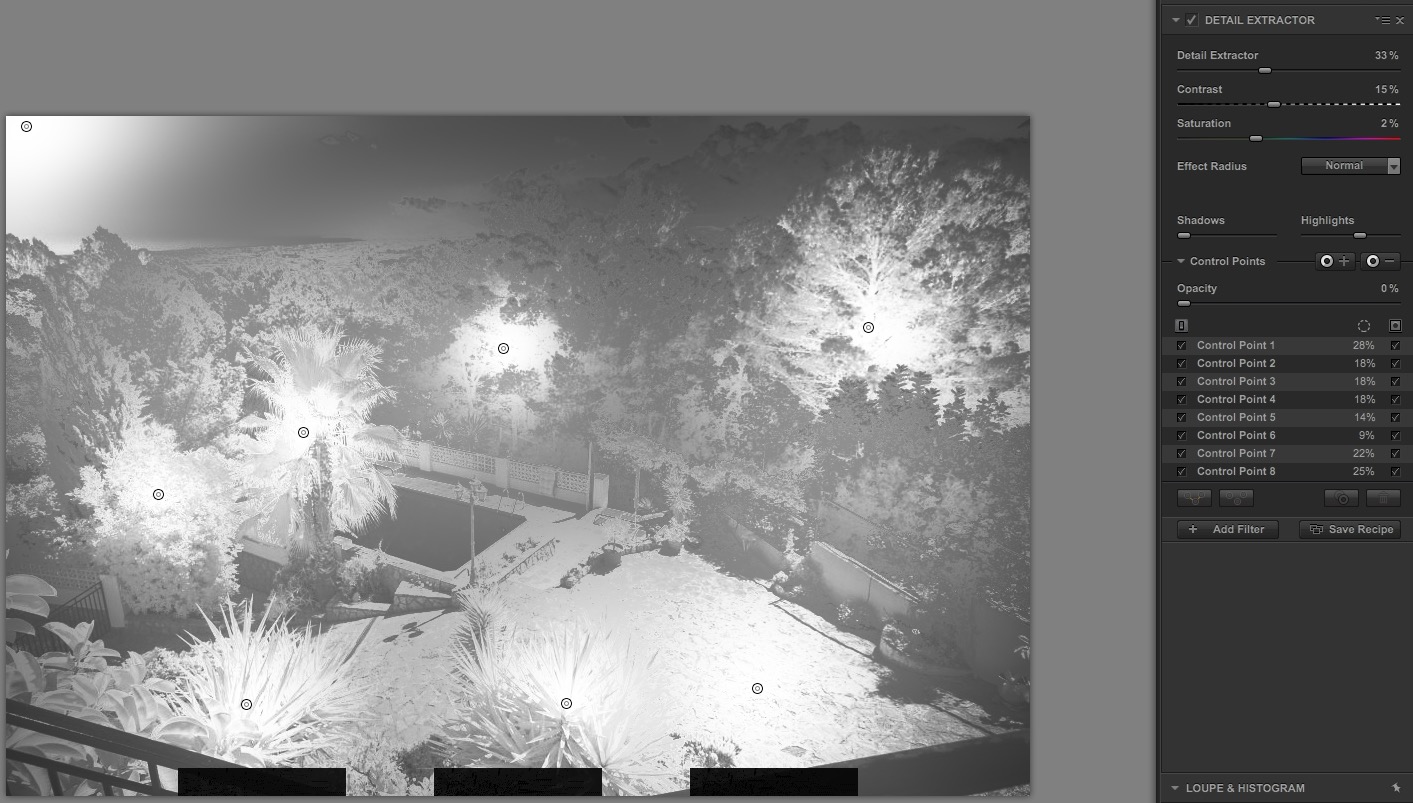 I am very impressed how well the Nik software deals with the subtle shades of the IR. Seems a worthy replacement for Bibble. As I remarked above, I just hope Nik is supported into the future now the sales revenue has been stopped. Having seen the output here I don't think it has improved it as much as I thought but the darker areas have benefited from the adjustments. Small JPEG isn't a good starting point... The reflections in the pool have improved, I think there are subtle improvements if you look for them. I tried Darken edges Lighten Centre, Pro Contrast and a couple of others but the Extract Detail seemed best.
____________________ Robert. |
| Posted by jk: Sun Mar 27th, 2016 04:30 | 13th Post |
| Yes the subtle detail is definitely better. The reflection of the palm in the water is good. I used Silver Efex, while you are using Color Efex.
____________________ Still learning after all these years! https://nikondslr.uk/gallery_view.php?user=2&folderid=none |
| Posted by Robert: Sun Mar 27th, 2016 05:05 | 14th Post |
| I use Silver Efex first, then on your image I used Colour Efex for the define filter. I think the Silver Efex Harsh filter was maybe too harsh, I have just done another for which I used a softer filter, that was harsh enough, need to start from an NEF really to get good results. Each image is individual. I don't completely agree with this 'recipe' idea unless you are doing loads of similar images, when of course it would be invaluable. I try to vary my subjects and compositions as much as I can, while I can see the benefits, they are not much use for me. Will post the latest 're-worked' image shortly. I am having some issues with artefacts, I think they may be related to my graphics card, apparently my GPU isn't particularly compatible with Ps, or Lr, so maybe it isn't very compatible with Nik software either... What I need is a nice new Mac Pro.
____________________ Robert. |
| Posted by Robert: Sun Mar 27th, 2016 05:50 | 15th Post |
| OK This one was, for me particularly difficult. I reprocessed it several times when I took it but was never really happy with the result. Queen Victoria in Dalton Square, Lancaster. This is the NEF straight from the camera. 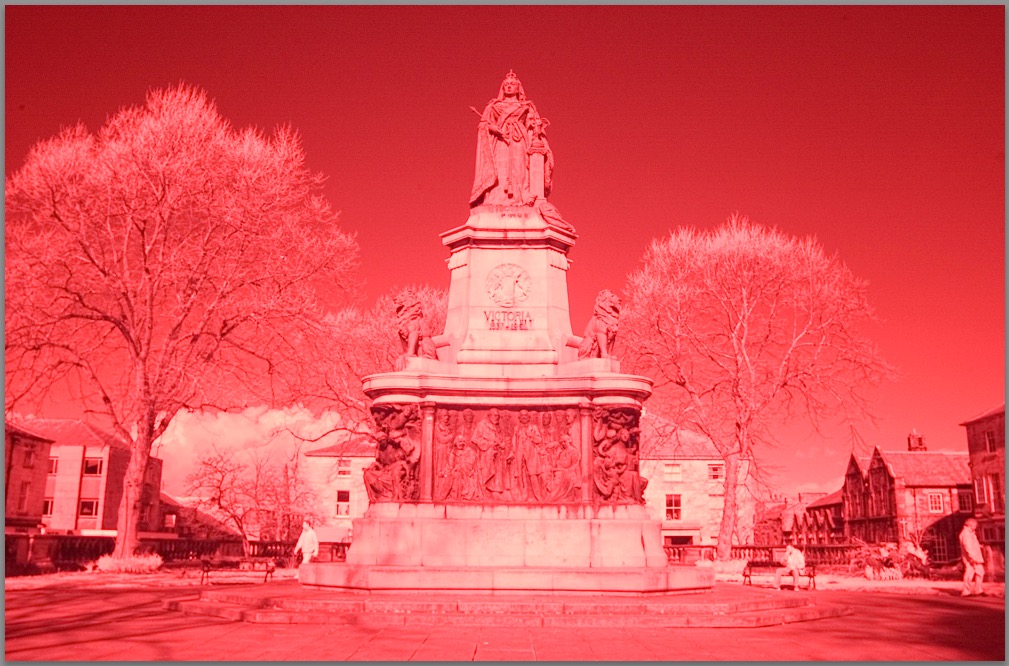 This was my final attempt in 2007 using Photoshop. 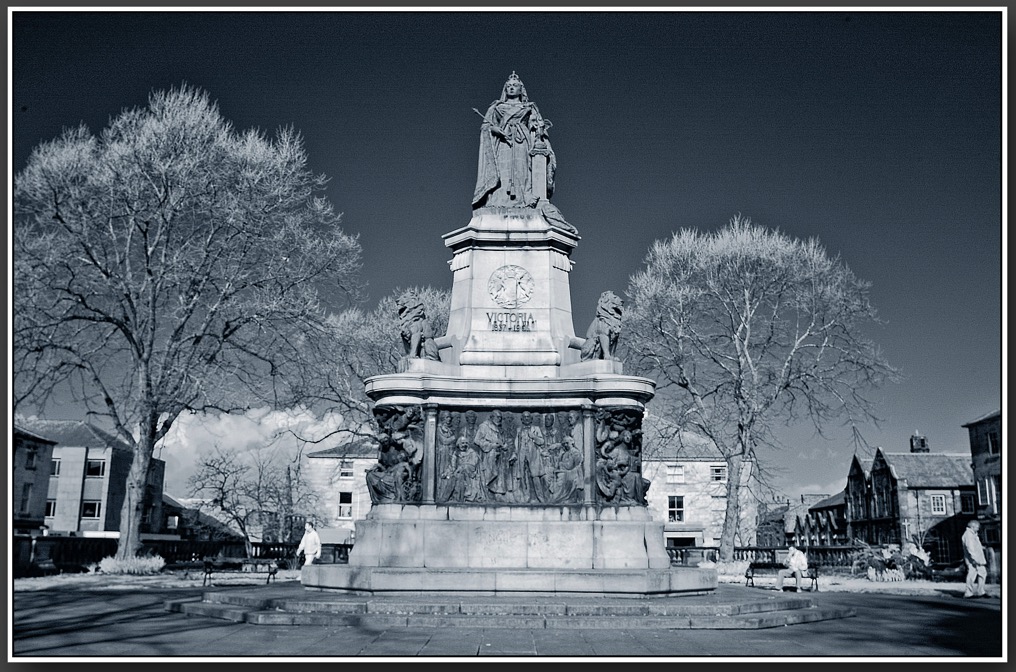 This is my latest attempt using Photoshop and Silver Efex followed by Colour Efex and Dfine. It seems to me to be brighter and cleaner. 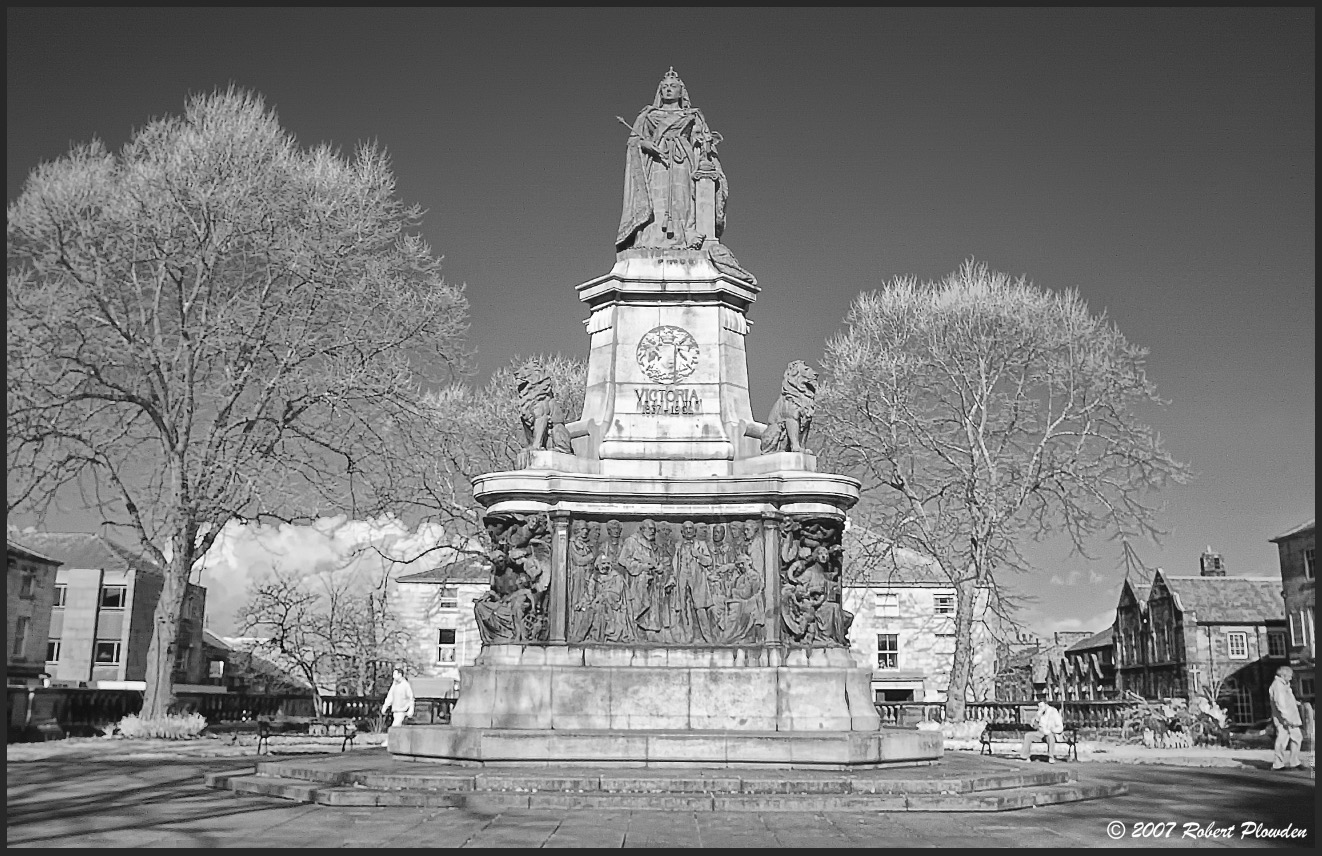 This is the settings and control points in Silver Efex, the following image shows the control points and the masking. White is affected (adjusted), black isn't. 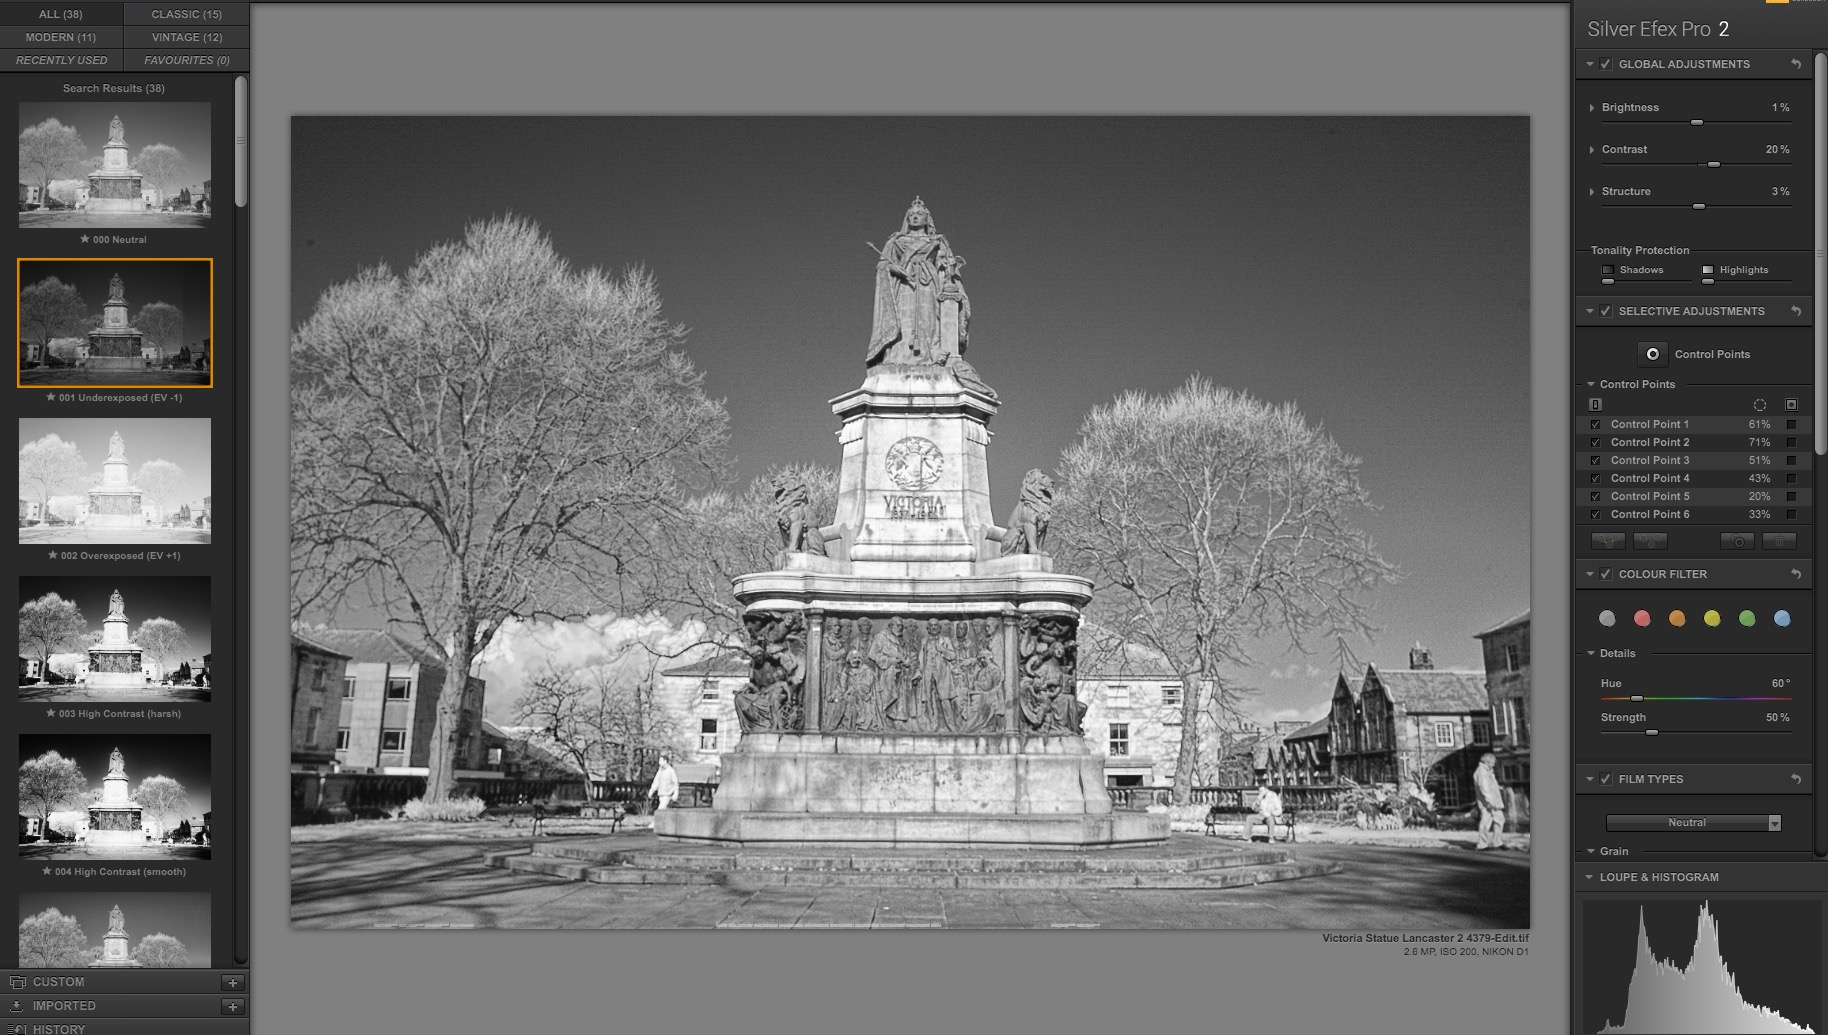 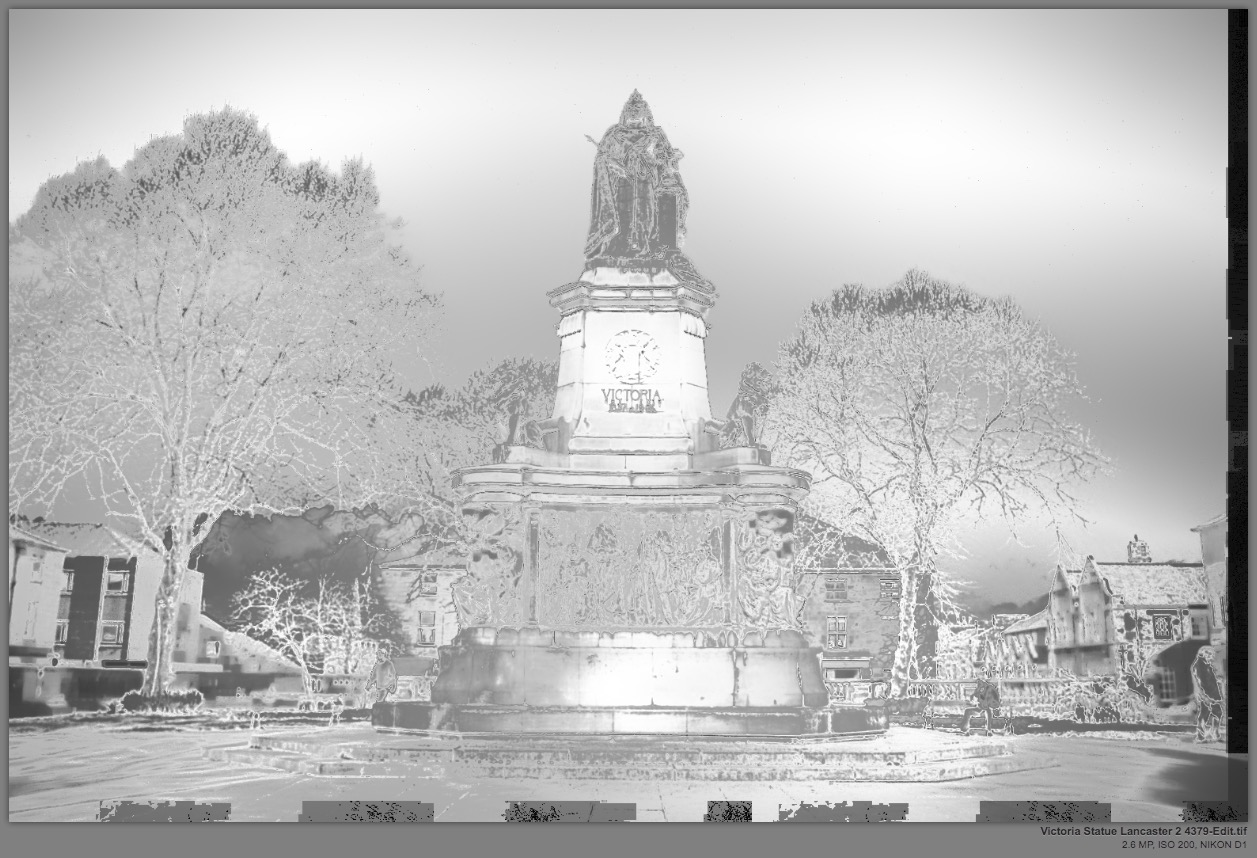 Mmmm, the actual control point mapping isn't shown on these screenshots but they are central to the bright areas. This image also shows the artefacts which appear randomly, refreshing the screen usually either removes or changes them. Always at the right or bottom of the image. taking the image back into Lr. seems to get rid of them but they persisted when I saved this back to Ps. Edit: I have manually marked an image with the approximate zones which I set for the Silver Efex filter. The zones DO NOT delimit the area affected, the selection is made by clicking on an area which represents the shade and texture which is to be adjusted. Once the selection is made it's easy to go to the mask view and fine tune the position and radius of the adjustment area. The exact position of the control point is quite critical yet the effect is easy to see. 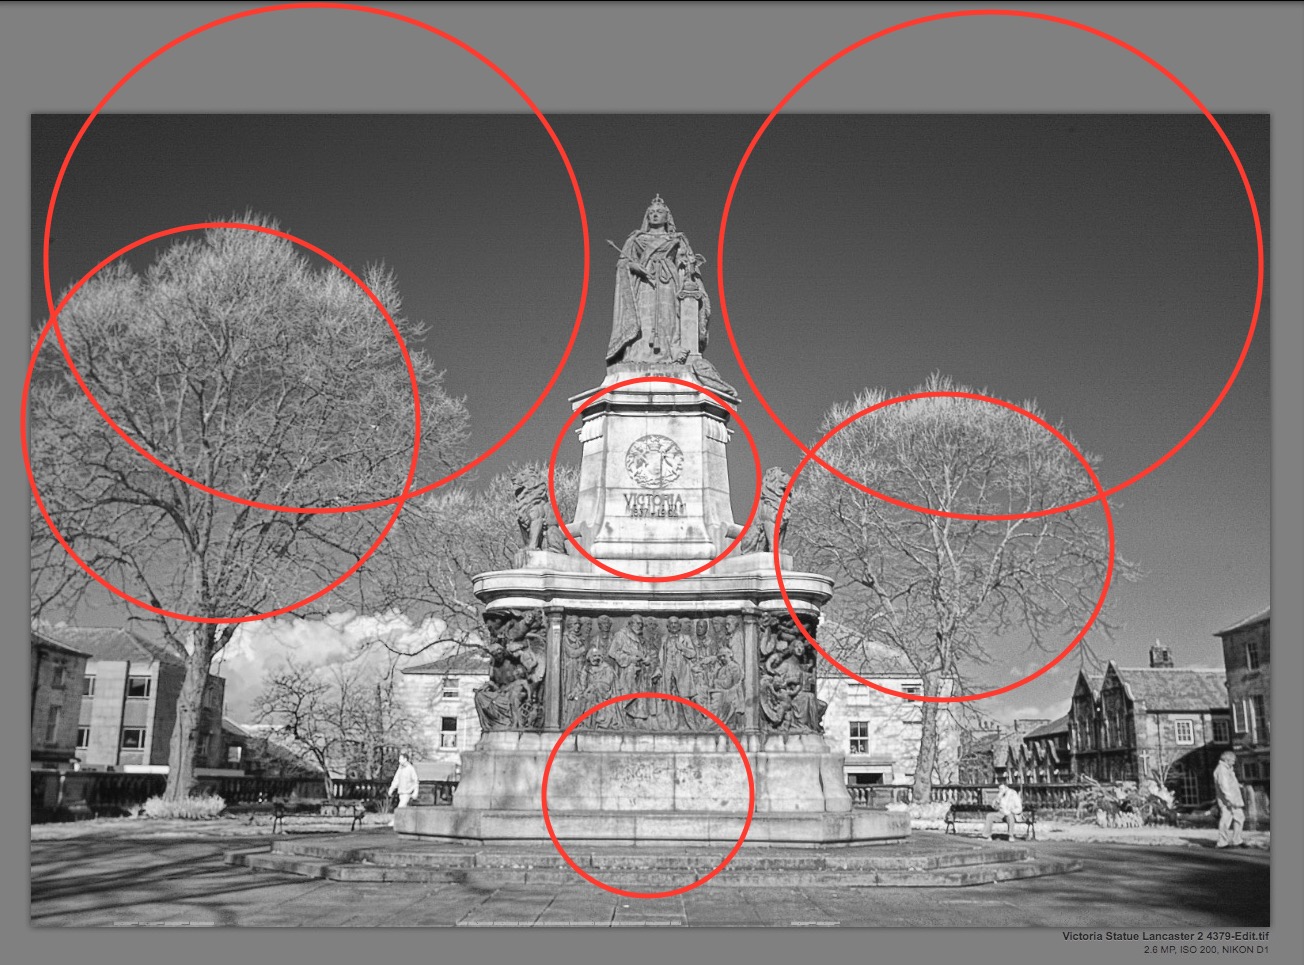
____________________ Robert. |
| This is topic ID = 1300 | ||
| Nikon DSLR Forums > The Image Processing and Editing Forums > Software for Image Processing > Google Nik Collection is now free! | Top | |
Users viewing this topic |
||
Current theme is Blue
| A small amount of member data is captured and held in an attempt to reduce spammers and to manage users. This site also uses cookies to ensure ease of use. In order to comply with new DPR regulations you are required to agree/disagree with this process. If you do not agree then please email the Admins using info@nikondsl.uk Thank you. |
Hosted by Octarine Services
Copyright © 2008-2024 Data 1 Systems
Page processed in 0.1408 seconds (66% database + 34% PHP). 107 queries executed.
Copyright © 2008-2024 Data 1 Systems
Page processed in 0.1408 seconds (66% database + 34% PHP). 107 queries executed.