| Moderated by: chrisbet, | Page:   |
|
|||||||
| Night Sky Photography - Page 2 | |
| An Equatorial Mount: My lucky day! | Rate Topic |
| Author | Post |
|---|
| Posted: Sat Mar 9th, 2019 04:45 |
|
11th Post |
Robert

|
It's a massive challenge, I know a little about the stars but really getting into it with a proper mount, albeit old, I reckon it's about 1985 ish. It must have been very advanced in it's day because it uses stepper motors, even now there are manufactures who are still using DC synchronous motors nearly 35 years on. Think 'star drift' is a factor, I couldn't lock on to Polaris because I couldn't see it clearly enough so I used the Ursa Minor group instead right next to Polaris, which is also etched into the polar finder. in the 35 years since the mount was etched I believe the stars have drifted. I also need to do tests to check the alignment of the scope. Given the polarity of the motor had been swapped I don't take anything at face value. There seems to be a regular deviation in the mount which I need to understand, it may be caused by hard grease on the worm wheel having solidified and causing a regular change in resistance. I am hoping it will be 1/144 of a day interval because thats the worm gear ratio, it might also be the meshing of the 40 tooth drive wheels between the motor and the worm shaft. For a delicate mechanism it's a pretty crude drive, with an open pair of gears and one imprecise bolt to secure the motor in position, you can't turn the motor shaft because it's geared back by 1/120th down-gearing, unless somebody has in the past and bent something in the motor drive. Anything is possible, it might even have been dropped. Given the use of stepper motors, I could make my own driver controller, I have all the bits with an Arduino programmable controller right here. Will post pix later.
____________________ Robert. |
||||||||
|
| |||||||||
| Posted: Sat Mar 9th, 2019 05:34 |
|
12th Post |
jk

|
Try NightSky Pro on iphone. It is excellent.
____________________ Still learning after all these years! https://nikondslr.uk/gallery_view.php?user=2&folderid=none |
||||||||
|
| |||||||||
| Posted: Sat Mar 9th, 2019 12:14 |
|
13th Post |
Robert
|
I do use Night Sky, not pro, yet... It was that app which helped me locate Polaris in the end. Here are some images from my first attempt with the Vixen Polar mount. The first is a 100% crop (that is one sensor pixel to one screen pixel, these are all screenshots from Lightroom, hosted on Flicker) this is with the polar mount doing it's thing, nor perfectly set up but pretty near. 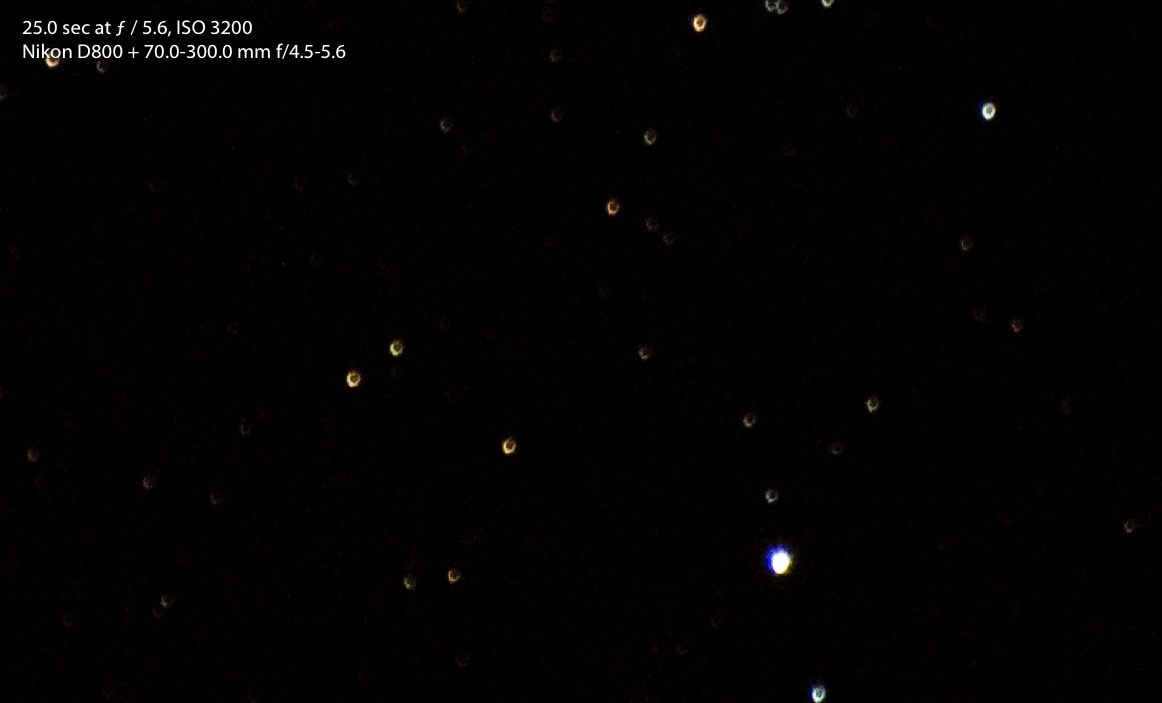 The second is a similar crop after I had switched off the Vixen tracking motor. 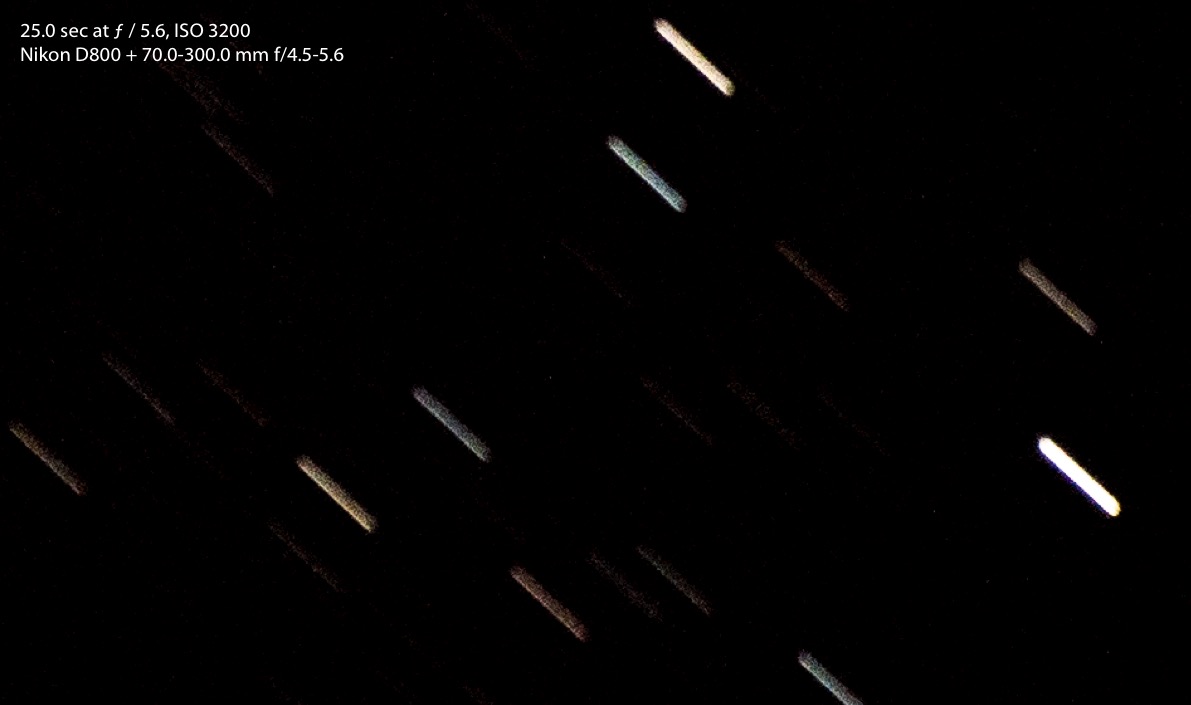 Now for the trails, bear in mind each exposure starts at 40 second intervals, 25 seconds of exposure, 15 seconds gap. 34 'Star Trail Stacked' exposures using the Vixen Polar mount. The squiggles are due to uneven tracking, why it's uneven I don't yet know. Like I said above, it may be due to the motor gear's alignment with the main worm gear shaft, or it may be due to stiff grease causing hard spots in the rotation. 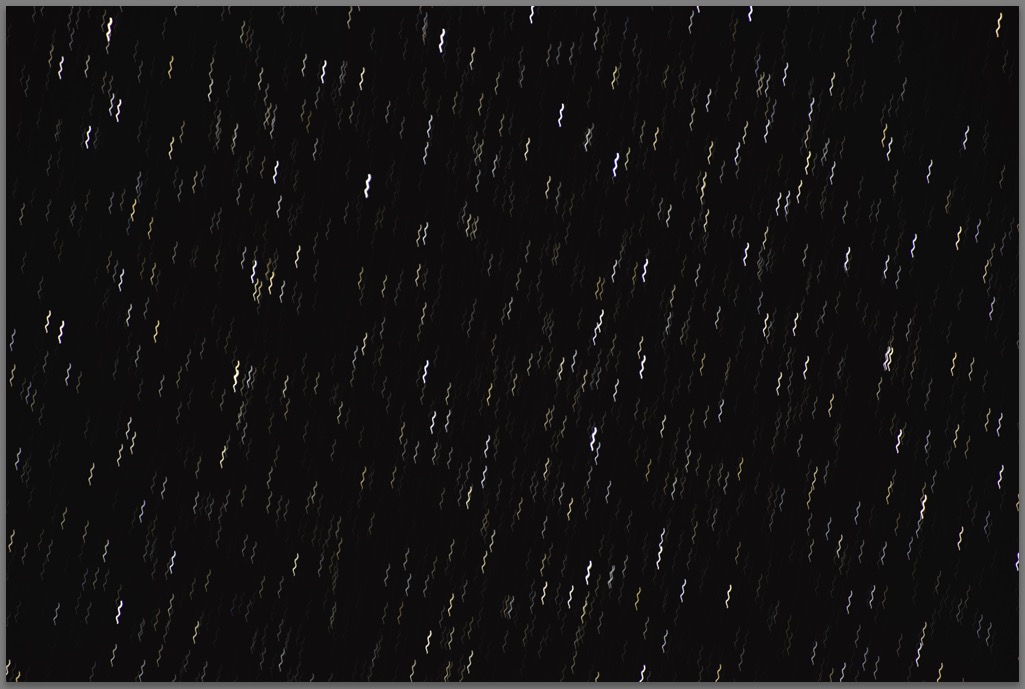 This is 38 'Star Trail Stacked' exposures, including the ones with the motor switched off, you can clearly see the exposure length and gap in the final four exposures, the mount is really doing it's stuff, almost perfect. 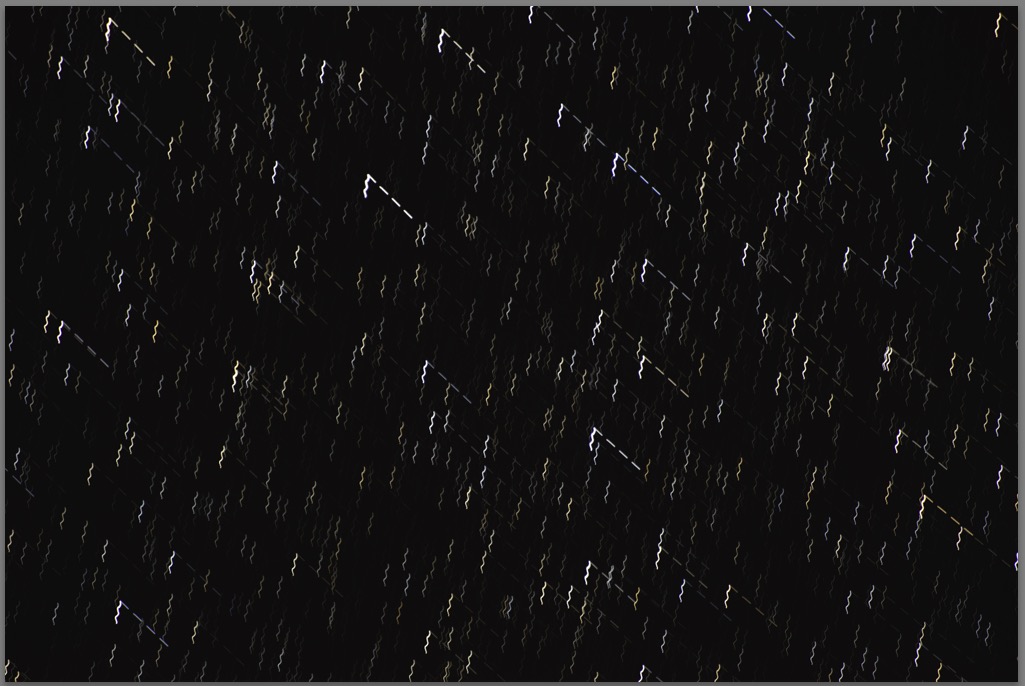 Finally a 100% crop of the previous image. 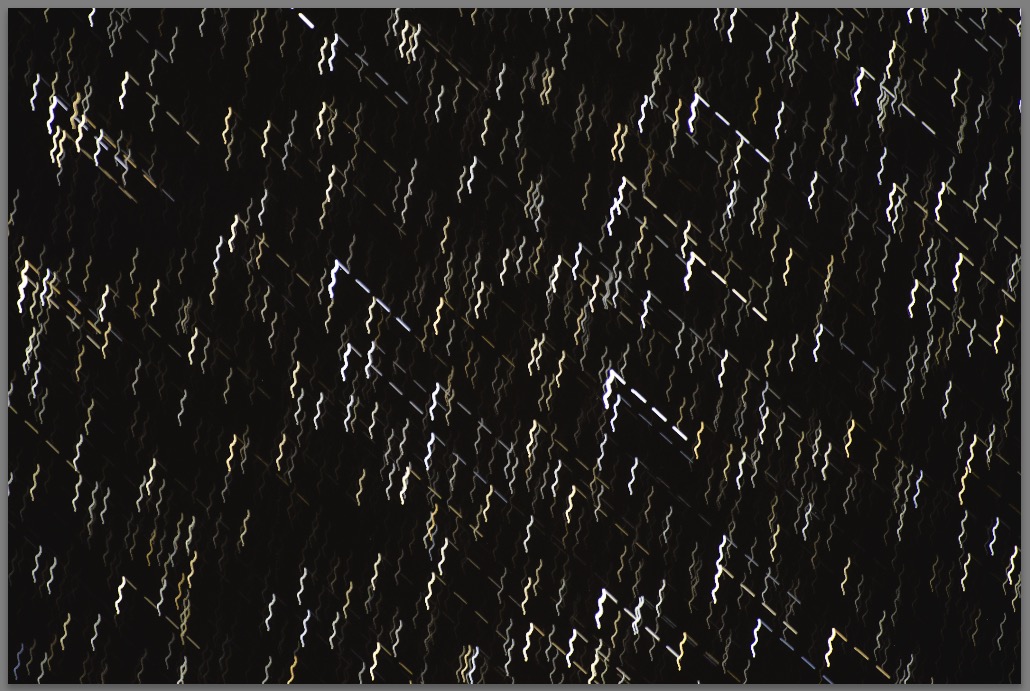 I have a lot of testing to do to check out the veracity of the polar scope and the uneven tracking.
____________________ Robert. |
||||||||
|
| |||||||||
| Posted: Sat Mar 9th, 2019 16:03 |
|
14th Post |
jk
|
Have you seen this article? https://themcdonalds.net/richard/wp/setting-up-an-equatorial-mount/
____________________ Still learning after all these years! https://nikondslr.uk/gallery_view.php?user=2&folderid=none |
||||||||
|
| |||||||||
| Posted: Sat Mar 9th, 2019 18:21 |
|
15th Post |
Robert
|
No, will have a look in the morning, thanks.
____________________ Robert. |
||||||||
|
| |||||||||
| Posted: Mon Mar 11th, 2019 19:51 |
|
16th Post |
Robert
|
I have looked at the link JK, thanks it's a good, a well explained set of articles, which don't assume the reader is accustomed to the jargon of astronomy, it never fails to puzzle me why, in writings aimed at explaining complicated processes to total novices, the writer often uses incomprehensible terminology which is only meaningful to an expert. I have unravelled the mystery of the wiggly lines. The motor output is 1/10th of a revolution per minute, 10 minutes per rev. The repeat time of the wiggly lines is 10 minutes. I am putting the uneven tracking down to the motor to worm shaft gears being too closely meshed and the gears not perfectly concentric. I have adjusted the meshing and tomorrow I am expecting to do a trial run in daylight to test the tracking and to adjust the polar scope, which is well out of adjustment. Somebody has been fiddling because it's so far out, it couldn't have been used properly as it was. I went to the local brickworks and asked to borrow their chimney, the manager was somewhat suspicious but said OK so long as they get it back tomorrow!  (At this point the Splash screen kicked in, I simply back swiped on my track pad and OK'd sending the form again nothing lost, brilliant, thanks Chris, that's long overdue.) Said chimney... 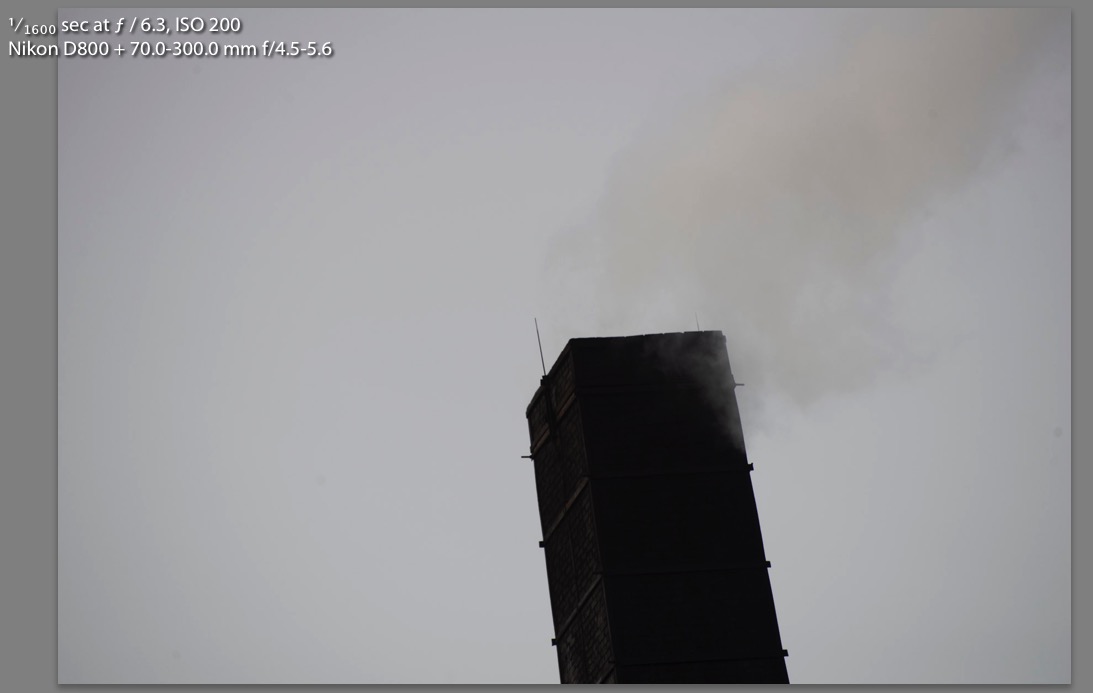 It's handy having the lightning conductor because it gives me a pin point accurate reference in the image. I am hoping when I have adjusted the polar scope, the rotated image will have all the images centred at that point, in fact this afternoon I used the nearest corner of the chimney as the target.
____________________ Robert. |
||||||||
|
| |||||||||
| Posted: Tue Mar 12th, 2019 03:57 |
|
17th Post |
jk
|
Well I think I am following your train of thought but I will need to read the article on the set up. If anyone has the patience and perseverence to work it out then it is you. Hope the testing today proves successful.
____________________ Still learning after all these years! https://nikondslr.uk/gallery_view.php?user=2&folderid=none |
||||||||
|
| |||||||||
| Posted: Tue Mar 12th, 2019 05:56 |
|
18th Post |
Robert
|
I just reduced the opacity of the layers in PS so the orientation of the four images can be seen, I don't quite understand the pattern of the cyan guide lines but the red circles are the reference points of the corner of the chimney. That was what the polar scope was aimed at. The weather isn't conducive to playing outside, cold and wet, but it may improve this afternoon...maybe not, that's when the gales arrive.  Edit: I just realised the lower left red circle was in the wrong place, I have attempted to remove it and have put a slightly bolder red ring in the correct place. 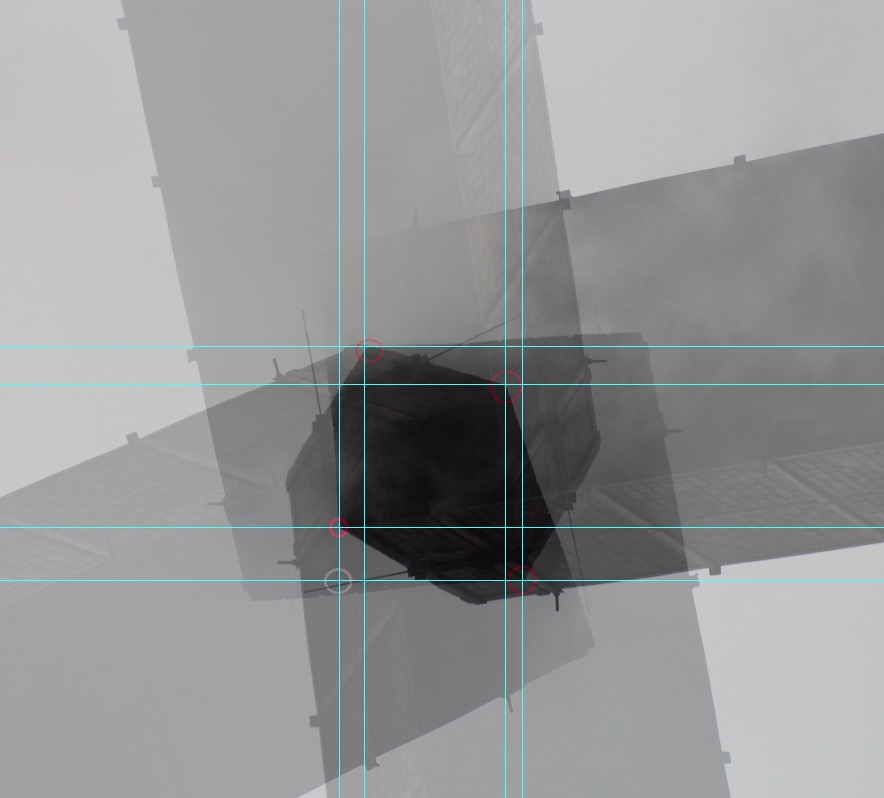
____________________ Robert. |
||||||||
|
| |||||||||
| Posted: Tue Mar 12th, 2019 06:50 |
|
19th Post |
jk
|
So your reference (polar) point is the nearest (front) corner of the chimney. So everthing should revolve around that reference point? So all the reference points in all the pictures should overlap in a single place? Or am I missing something?
____________________ Still learning after all these years! https://nikondslr.uk/gallery_view.php?user=2&folderid=none |
||||||||
|
| |||||||||
| Posted: Tue Mar 12th, 2019 12:14 |
|
20th Post |
Robert
|
jk wrote:So your reference (polar) point is the nearest (front) corner of the chimney. Yes, the reference point was the corner of the chimney, I have just adjusted the polar scope and loaded the images into Lightroom, it was extremely difficult in the wind, I may have wasted my time today. Will see in a few minutes I have 193 images to sift through, I know many of them are scrap because the AF went awol perhaps because the camera was being buffeted by wind.
____________________ Robert. |
||||||||
|
| |||||||||
| This is topic ID = 1677 Current time is 19:30 | Page: | |
| Nikon DSLR Forums > Photography > Photography Projects > Night Sky Photography | Top | |
Users viewing this topic |
||
Current theme is Modern editor
| A small amount of member data is captured and held in an attempt to reduce spammers and to manage users. This site also uses cookies to ensure ease of use. In order to comply with new DPR regulations you are required to agree/disagree with this process. If you do not agree then please email the Admins using info@nikondslr.uk Thank you. |
Hosted by Octarine Services
UltraBB 1.173 Copyright © 2008-2025 Data 1 Systems
Page processed in 0.0664 seconds (68% database + 32% PHP). 81 queries executed.
UltraBB 1.173 Copyright © 2008-2025 Data 1 Systems
Page processed in 0.0664 seconds (68% database + 32% PHP). 81 queries executed.