| Moderated by: chrisbet, | Page:   |
|
|||||||
| Night Sky Photography - Page 7 | |
| An Equatorial Mount: My lucky day! | Rate Topic |
| Author | Post |
|---|
| Posted: Wed Apr 10th, 2019 03:54 |
|
61st Post |
chrisbet
|
Thanks - any view on the Unread posts button? I find that the easiest way to check for new posts.
____________________ If it is broken it was probably me .... |
||||||||
|
| |||||||||
| Posted: Wed Apr 10th, 2019 11:01 |
|
62nd Post |
Robert

|
This Nothing spectacular, I had hoped to try the 300mm but until I get a real handle on the Polar alignment there is no point. I took these pics with the 16mm f/2.8 fisheye. The mount is rock solid, well on top of it's job, the adjustments are nice, the right angle finder is good enough. I have established that Polaris is closer to the celestial North than it was in 1985 by about 50%. I now think I know how to set the Right Ascension (RA) to the celestial 'clock' by aligning Ursa Major with the etched markings in the Polar scope. Now that I know Polaris is only about 2 degrees from celestial North, that makes the RA adjustment less critical in a sense, although for long exposures with a long lens it does matter, especially if the subject is well away from the pole. The Milky Way is close to the horizon. All images taken with Nikon D800 and Nikkor 16mm f/2.8 fisheye @ ISO1600, 30 seconds at f/4.0, taken at 35 second intervals. 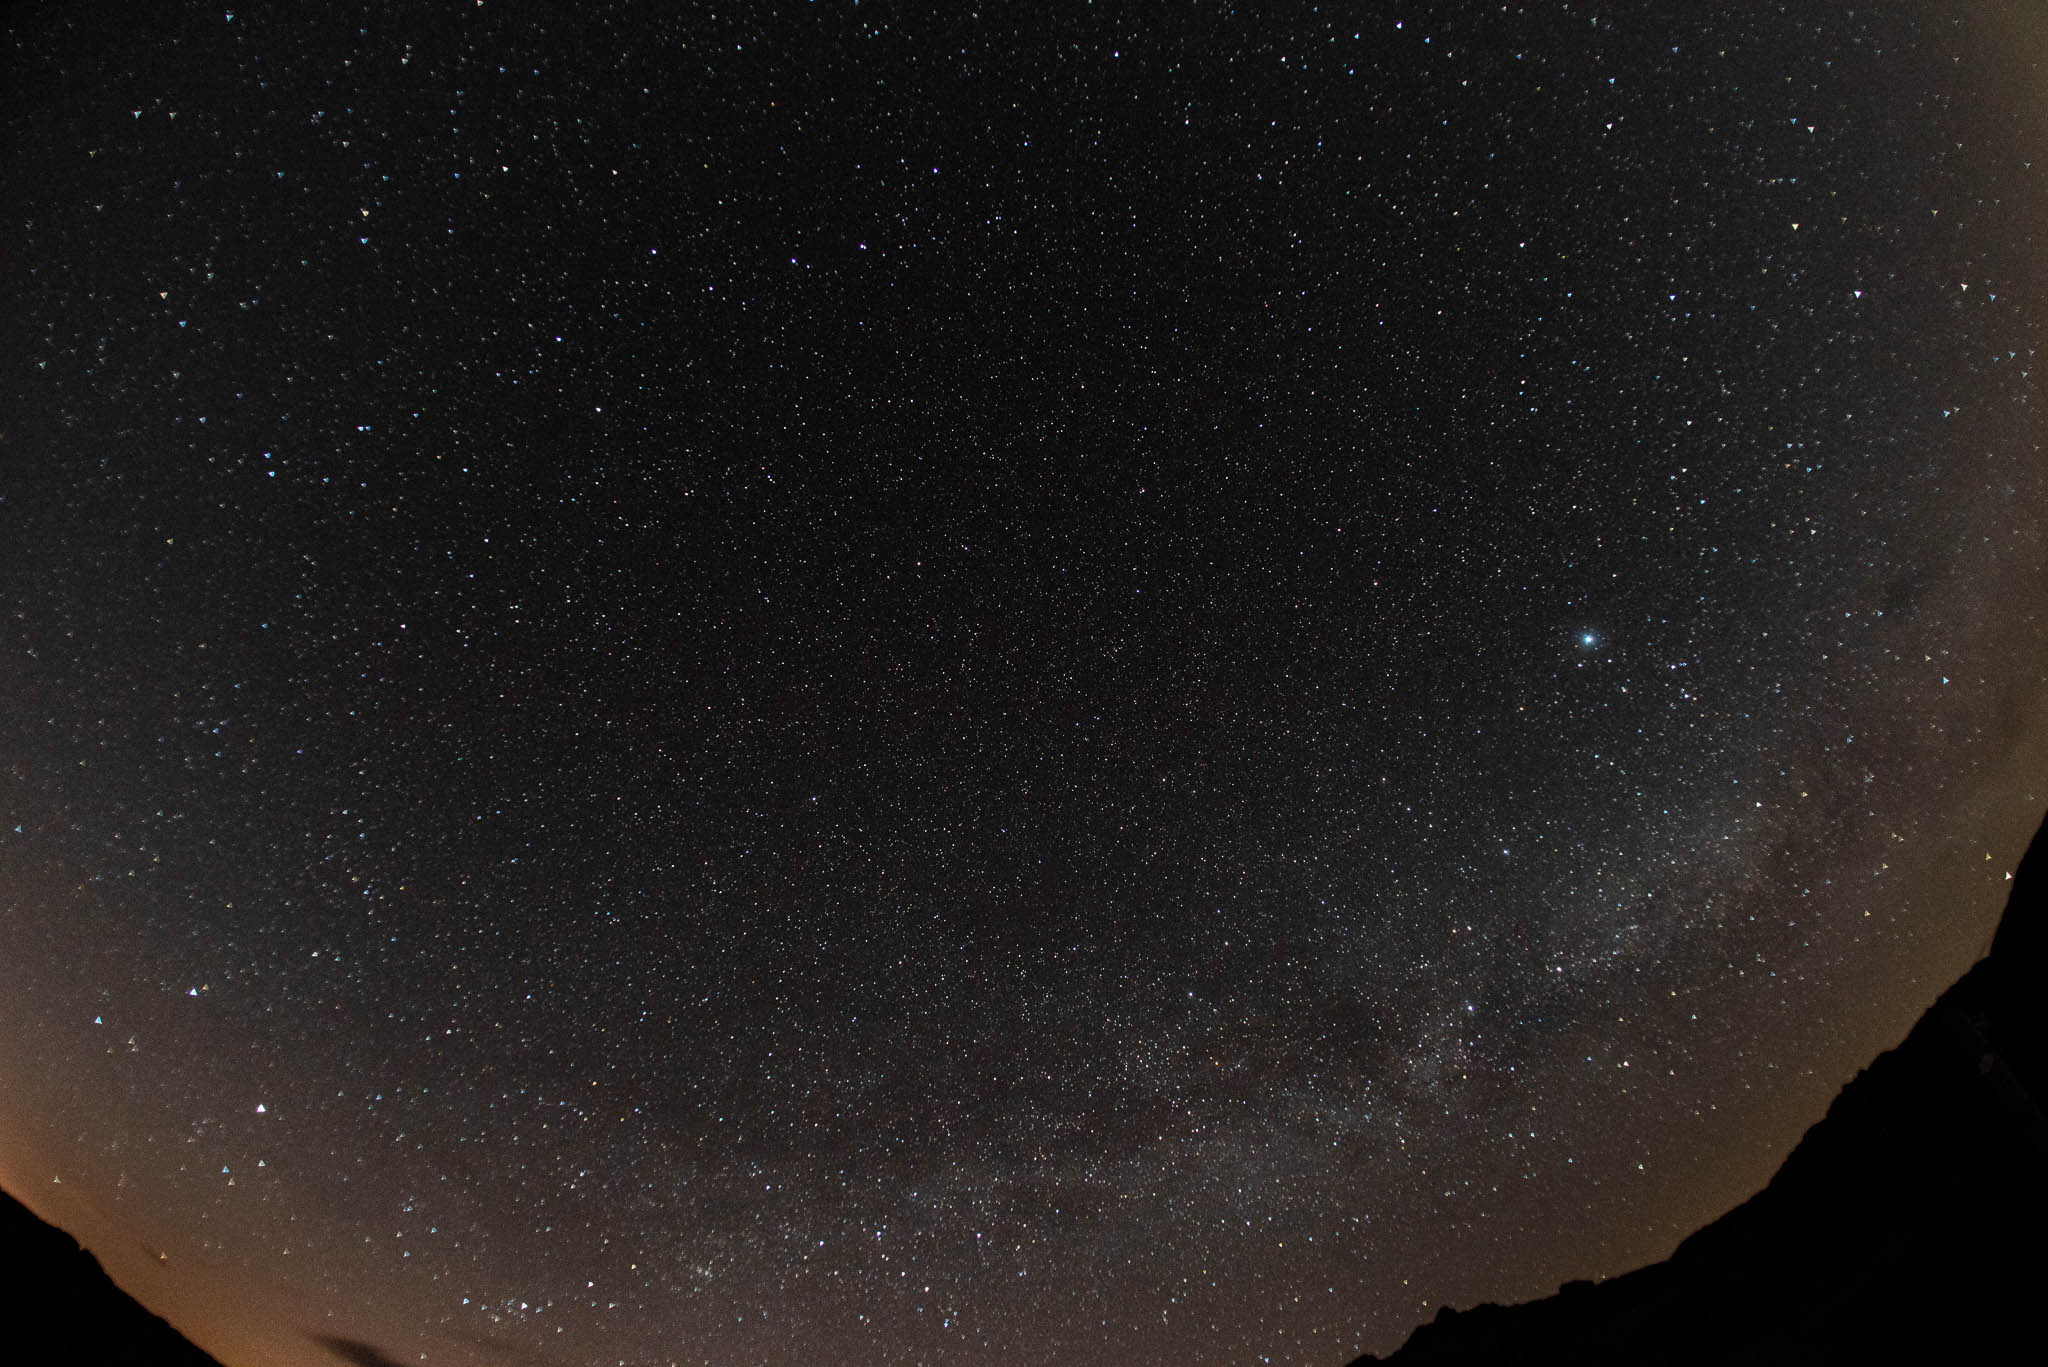 This is 20 exposures taken with the polar mount running, stacked in StarstaX. Almost no trailing, the motor is doing the business but it's only a 16mm lens.  And 100% crop...  The next is with the Polar mount turned off. 37 exposures. And a meteor! 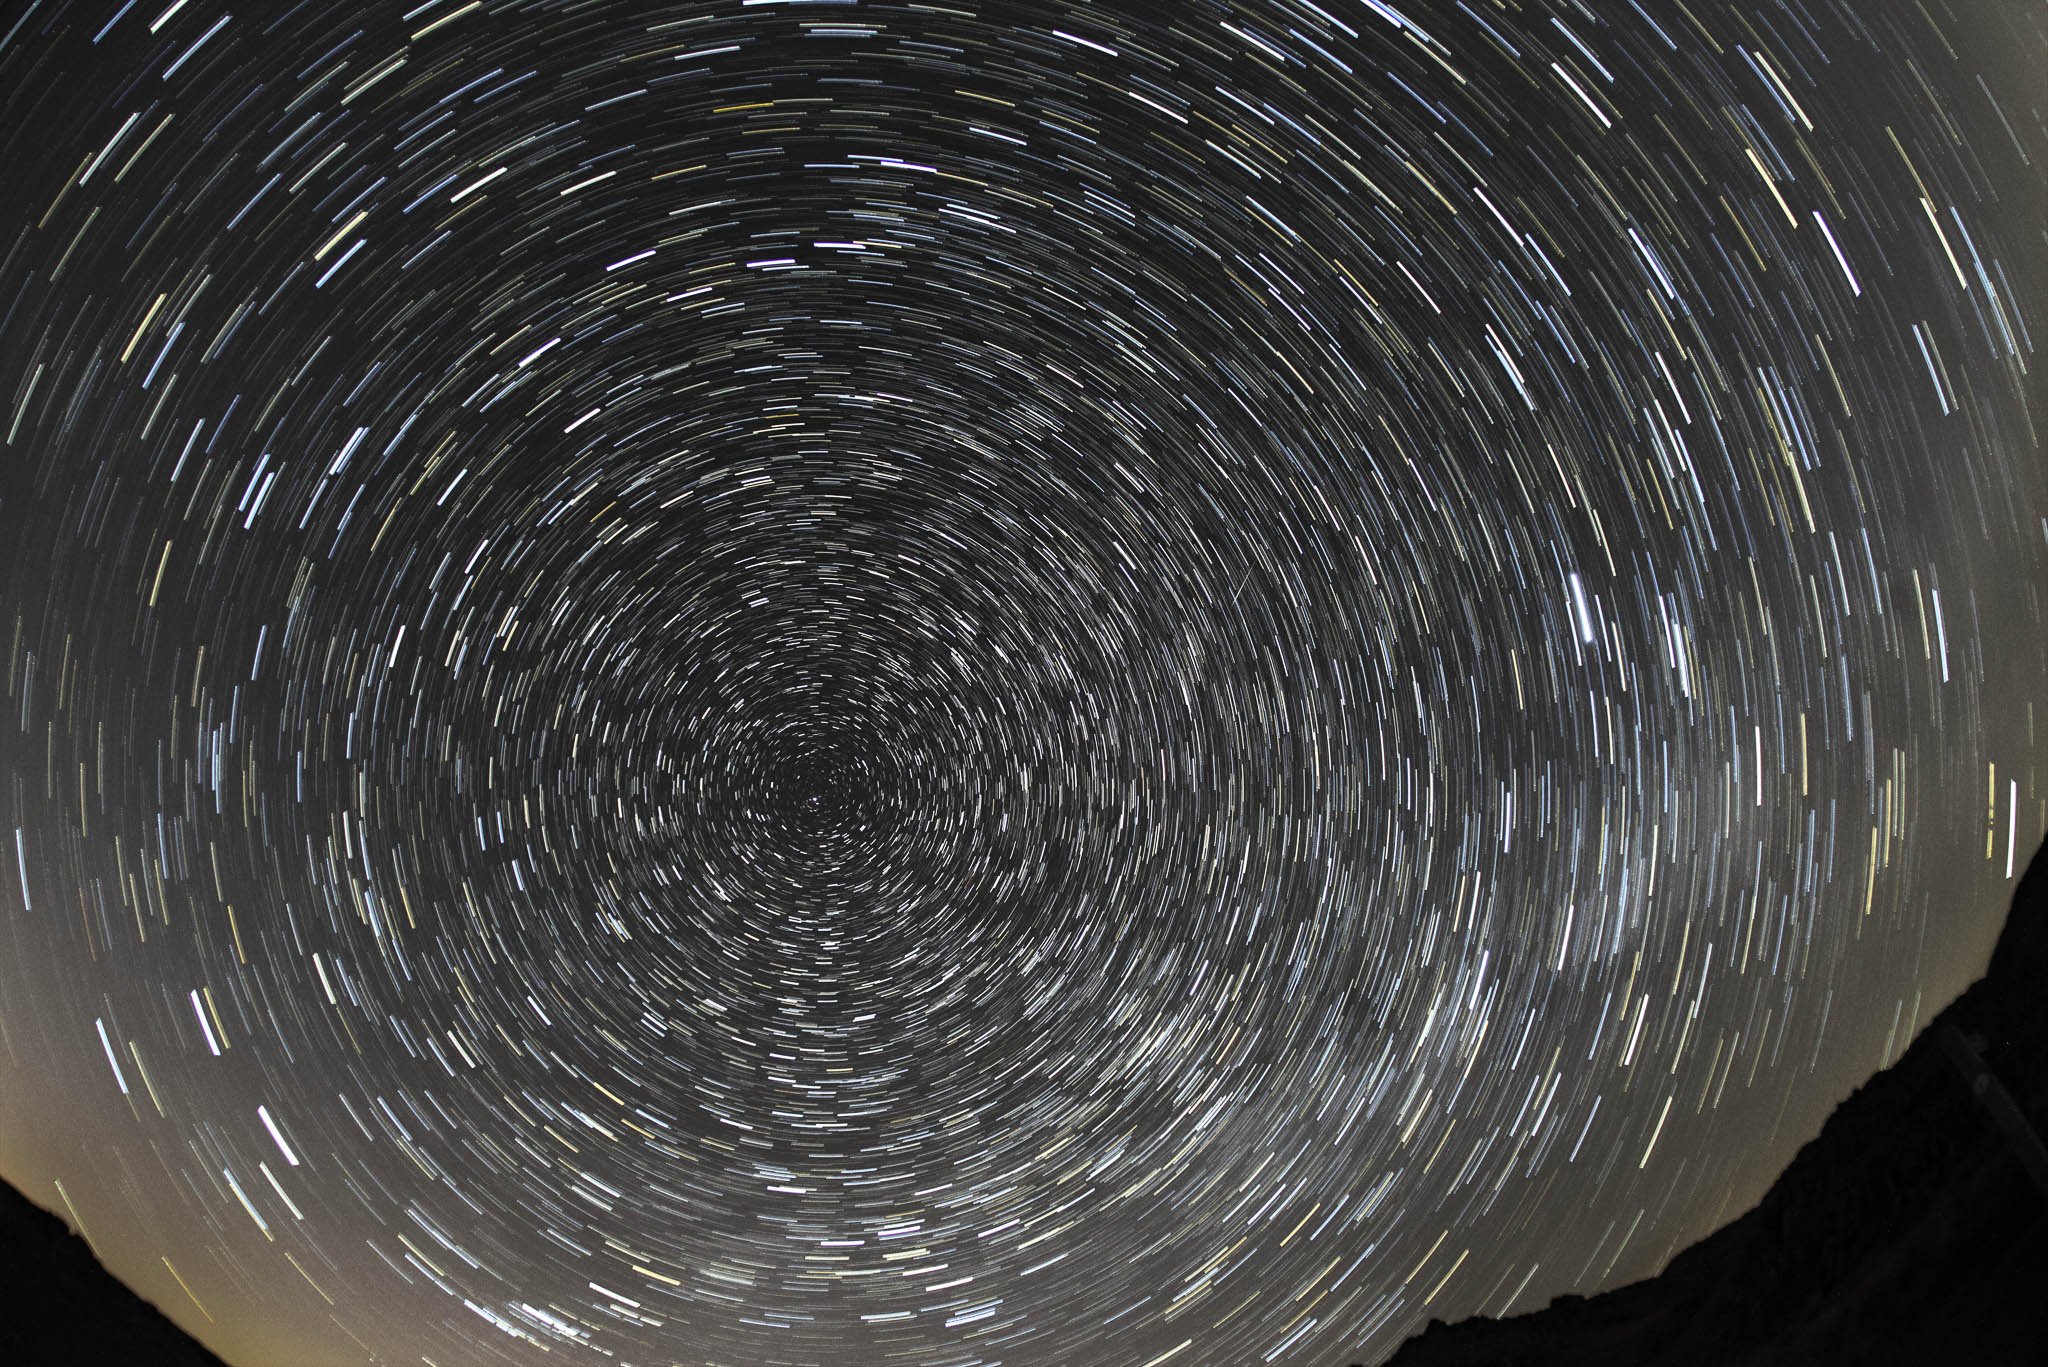 And 100% crop... Also showing the crop area.  With the 100% crop, you can clearly see that Polaris is nowhere near the celestial pole at that magnification with the D800 resolution. It's coming together.
____________________ Robert. |
||||||||
|
| |||||||||
| Posted: Thu Apr 11th, 2019 04:45 |
|
63rd Post |
chrisbet
|
Looking at those photos brings to mind a couple of Douglas Adams quotes : "Space is big, really big." and "The last thing you need is a sense of perspective." 
____________________ If it is broken it was probably me .... |
||||||||
|
| |||||||||
| Posted: Thu Apr 11th, 2019 04:58 |
|
64th Post |
jk
|
Well the latest black hole pictures are interesting. https://www.bbc.co.uk/news/science-environment-47873592 Robert, your next project is.......
____________________ Still learning after all these years! https://nikondslr.uk/gallery_view.php?user=2&folderid=none |
||||||||
|
| |||||||||
| Posted: Thu Apr 11th, 2019 05:08 |
|
65th Post |
chrisbet
|
Yes - I watched BBC4 last night - very interesting - couldn't help thinking about Robert while they were trying to align 8 telescopes all over the world to focus on such a tiny target - an orange on the moon I think they said!
____________________ If it is broken it was probably me .... |
||||||||
|
| |||||||||
| Posted: Thu Apr 11th, 2019 09:44 |
|
66th Post |
jk
|
Robert, Please can you post a picture of your current setup preferably with the 300mm on the camera so I can see the setup. I have looked at the manual briefly but everything seems to be driven from the telescope being in place.
____________________ Still learning after all these years! https://nikondslr.uk/gallery_view.php?user=2&folderid=none |
||||||||
|
| |||||||||
| Posted: Thu Apr 11th, 2019 10:08 |
|
67th Post |
Robert
|
Yes, no probs, I have it set up outside now, fine tuning the Polar scope.
____________________ Robert. |
||||||||
|
| |||||||||
| Posted: Thu Apr 11th, 2019 18:37 |
|
68th Post |
Robert
|
Doh!  Sorry, I clean forgot to take picture of setup, will try tomorrow. I took the D3300 out specially to make some pix for posting but I was so focused on adjusting the mount that I clean forgot to take pix of it. I spent all last night outside with the mount, determined to overcome my lack of understanding of the adjustments and practice setting it up. Part of the problem has been that the Polar scope reticule wasn't adjusted properly. It's impossible to set the altitude and azimuth if the Polar scope itself isn't set right in the first place. I had been trying and no matter how hard I tried, I got nowhere. Going back to basics today I spent time adjusting the reticule in daylight, I now have it set up very close to an optimum setting. It isn't easy because it requires adjustment in two axis with three screws, possible but for very fine adjustments it's not easy, the Allen key is 0.9mm (tiny), I have fitted the Allen key into a small screwdriver handle to make it possible to hold with my arthritic fingers. Four adjustment screws would have been much easier. I still need to fully understand the time element since it can cause an error from zero to twice the distance between the celestial North pole and Polaris. As Polaris appears to describe a circle around the celestial North pole, one has to know *where* around that circle Polaris actually needs to be, because that is what determines where the centre of the circle is, it needs to be exactly centred on celestial North, an incorrect time causes an eccentric rotation, it would be exactly right once in 24 hrs. Difficult to describe, this adjustment is achieved by rotating the Polar scope to the correct angle, like setting a clock, which is correctly determined from periodic tables, by the date and time of day, a bit like tide tables, in fact probably uses the same base calcs. It can also be determined from the position of Ursa Major but in reality using Ursa Major is only a very rough guide. The more I use the EQ mount the more I realise how exacting the settings need to be. Even with modern and very expensive EQ mounts they are only as good as the alignment and support allows. For really accurate alignment massive foundations and an incredibly solid structure are needed. A tripod mounted setup is way too flimsy and then add the distortions caused by air movements. With the practice I have had, I can now get the mount roughly aligned in a few minutes. For most purposes that's probably good enough to reduce star-trailing to acceptable levels but for what I want I think I will also adopt another technique, rather than making very long exposures, which risk showing star-trail elongation of the image, I will take many relatively short exposures using the EQ mount to maximise the exposures and minimise the elongation. Because drift is likely over long sessions, using image alignment software will align the images exactly. My eventual hope is to be able to make pictures of planets, star clusters and nebula, I might eventually get a modest telescope if I find one at the right price.
____________________ Robert. |
||||||||
|
| |||||||||
| Posted: Fri Apr 12th, 2019 09:54 |
|
69th Post |
Robert
|
11 Pictures! Of the mount... #1  #2  #3  #4  #5  #6  #7  The original flimsy mount against my solid heavy duty mount. #8  The DR-3 right angled eyepiece with my adaptor, a bit of plastic plumbing fitting and three thumb screws out of an old Mac. #9  A somewhat out of focus eyepiece. #10  #11 
____________________ Robert. |
||||||||
|
| |||||||||
| Posted: Fri Apr 12th, 2019 10:27 |
|
70th Post |
jk
|
Thanks Robert. I think that I see what is the problem and the issue with some of your difficulties with sighting. If you want to call me this evening then we can chat it through. PMed you my mobile number.
____________________ Still learning after all these years! https://nikondslr.uk/gallery_view.php?user=2&folderid=none |
||||||||
|
| |||||||||
| This is topic ID = 1677 Current time is 18:00 | Page: | |
| Nikon DSLR Forums > Photography > Photography Projects > Night Sky Photography | Top | |
Users viewing this topic |
||
Current theme is Modern editor
| A small amount of member data is captured and held in an attempt to reduce spammers and to manage users. This site also uses cookies to ensure ease of use. In order to comply with new DPR regulations you are required to agree/disagree with this process. If you do not agree then please email the Admins using info@nikondslr.uk Thank you. |
Hosted by Octarine Services
UltraBB 1.173 Copyright © 2008-2025 Data 1 Systems
Page processed in 0.0691 seconds (70% database + 30% PHP). 80 queries executed.
UltraBB 1.173 Copyright © 2008-2025 Data 1 Systems
Page processed in 0.0691 seconds (70% database + 30% PHP). 80 queries executed.